A practical guide to contributing to Open Source Projects


After contributing to a project for a while, you may start getting some mentions to help out with some pull requests.

But most of the time you don’t even know where to start contributing.
The thing is…you don’t really have to wait for a mention to start reviewing a piece of work. You can even start going through the issues in a project and try and pick one up. If you ever need help, there will probably be a few other developers that will be available to help you out.
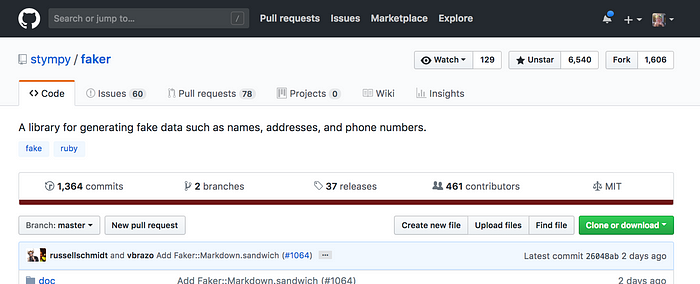
Let’s pretend I just picked this PR up randomly…
So let’s take a look at this PR…

The main point of this PR is to add Faker::Auto to the library. However, we already have Faker::Vehicle. So one of the suggestions was,
Why don’t you extend Faker::Vehicle?
So that is what we are going to be working on 🤓
How to start?
Lets take a look at some of the commits that are in this PR.

Hmmm…it seems as though some extra bits have snuck in here. Seeing as though the pull request is called add automotive data, I don’t think we need the changes to the phone numbers 😅. So when we come to creating our own PR, we can leave those changes out.
So in essence they have:
- Added the automotive data, which comes in the form of a YML file.
- Added the
Faker::Autoclass. - Added tests.
- Performed a few fixes, probably due to the age of the changes.
The plan 👨💻
So looking at the file changes, we need to look at the following:
- lib/faker.rb
- lib/faker.auto.rb
- lib/locales/en.yml
- test/test_faker_auto.rb

We can ignore any changes to lib/faker/phone_number.rb.
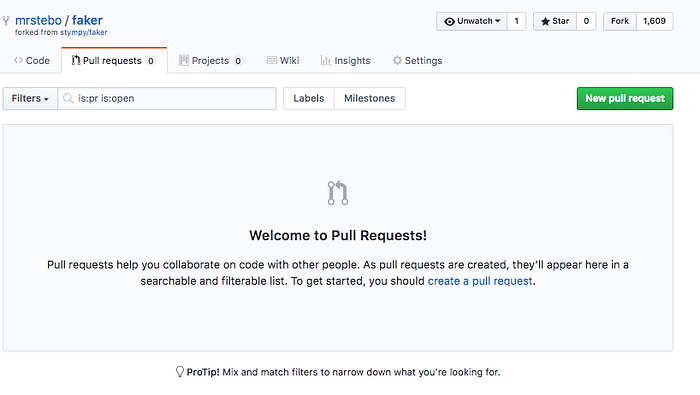
So to start making any changes we need to make a fork of this repository. To do this you click on the Fork button on the top-right.
Now we can clone this repository using the following command in the terminal:
git clone https://github.com/{username}/faker
This will create a local copy of the repository on your machine, which you can then start hacking around with.
We also need to perform an additional step. We want to be able to fetch PR branches from the main repository. For this we need to add the main repository as a remote. To do this we run the command:
git remote add upstream https://github.com/stympy/faker
Then we need to run a command to fetch the pull request.
git fetch upstream pull/692/head:automotive
With 692 being the ID of the pull request. and automotive being what we want to call our local branch. We could have used any branch name 👍
And then we need to checkout the branch that has just been created.
git checkout automotive
Awesome! Now we have the code that was submitted for the PR. Now we can start making some changes.

Time to get our hands dirty…
So we are all set up to make our changes. But first things first…we should probably run the following commands:
bundle install
This installs all the required dependencies for the project. These dependencies are located inside the Gemfile.
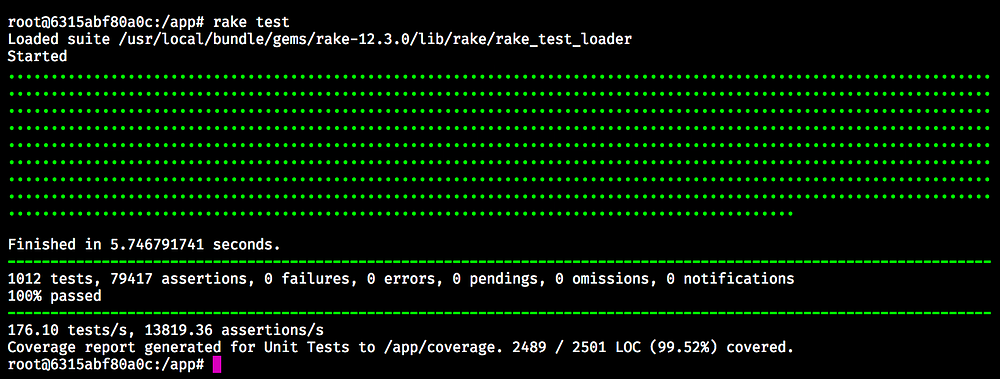
Then we should probably run the tests… 🙈
rake test
Which produces the following output:
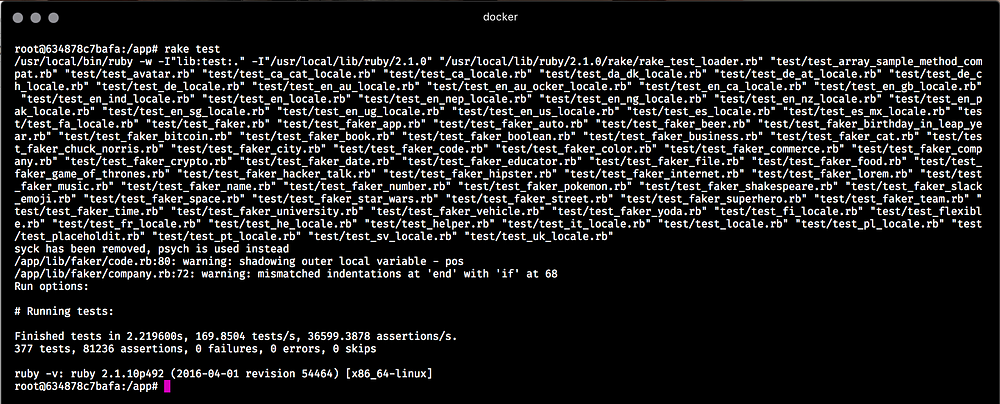
Excellent! The tests are passing. But wait…this branch is rather old…I think we should probably merge in the master branch so that we don’t run into any merge conflicts when we submit our new pull request.
git merge origin master
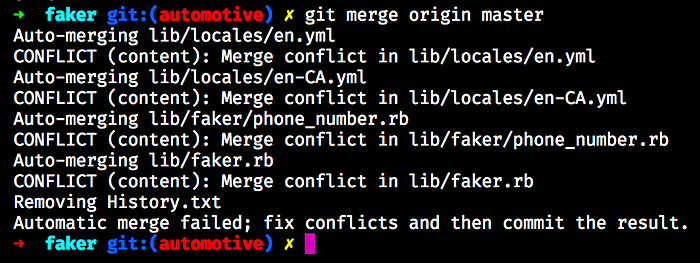
Ouch…okay! There are a few merge conflicts we need to fix already. Lets get started!
CONFLICT (content): Merge conflict in lib/locales/en.yml
So what has caused the conflict? This branch added all the automotive data into en.yml. This is where all the fake data used to live. However, in the later releases, each faker module has it’s own YML file.
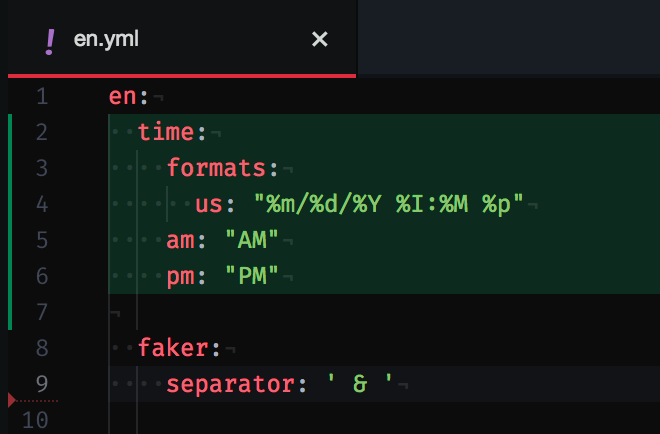
So to fix this we need to open up lib/locales/en.yml, and delete everything between <<<<<<< HEAD and =======. And you’ll also need to delete >>>>>>> origin.
With Atom you can select Use me on there changes to avoid having to manually delete stuff 🙌.

Then you’ll end up with a file that looks like this:
One down…three to go!
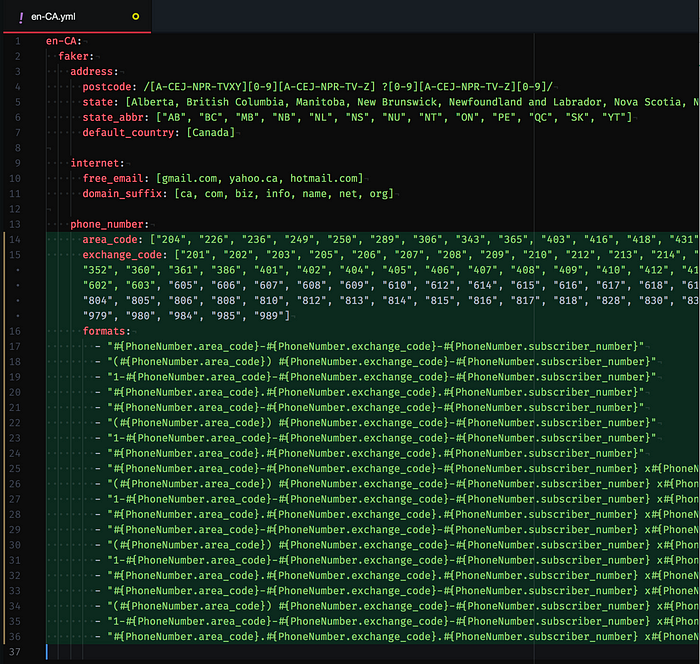
CONFLICT (content): Merge conflict in lib/locales/en-CA.yml
Ah! This is where the phone number changes were. I think we can safely resolve this by using the code that is in the master branch. So do exactly as we did for the previous file 👍
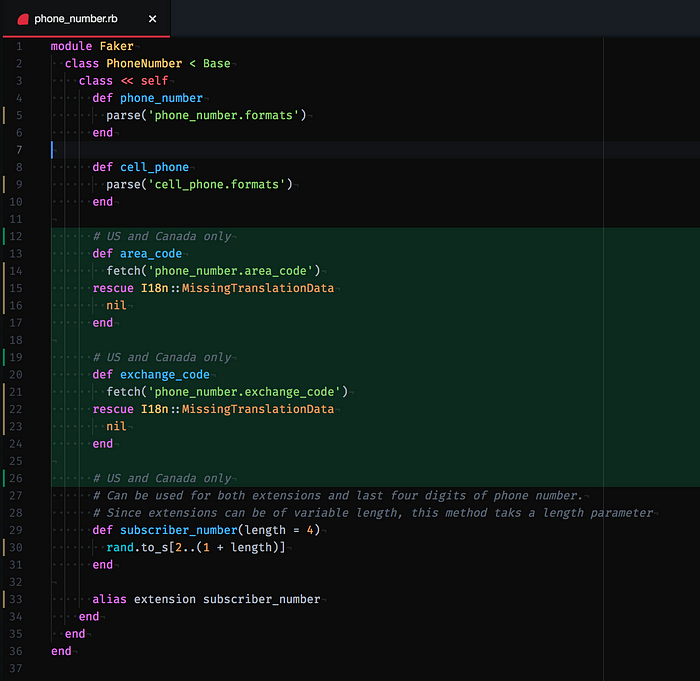
CONFLICT (content): Merge conflict in lib/faker/phone_number.rb
Ah, another one we can fix easily. We’ll just take their changes again!
CONFLICT (content): Merge conflict in lib/faker.rb
Let’s take a look. We have two conflicts in this file. So what is the issue with the first one?
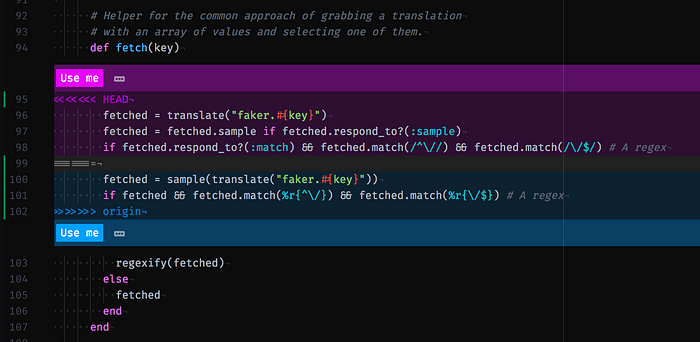
Right, so we are just avoiding checking if the fetched object responds to the sample method. This will probably introduce a breaking change when we go to run the tests. But the safe option is to take their changes again.
And the next conflict…

Ah! It looks as though previously you had to manually require your new faker module into faker.rb.
This has changed so it requires every ruby file in the faker folder 👍
I think we can take their changes!

Well that was easy…all we did was select their changes for everything 😂
Okay…lets see what has broken 🙈
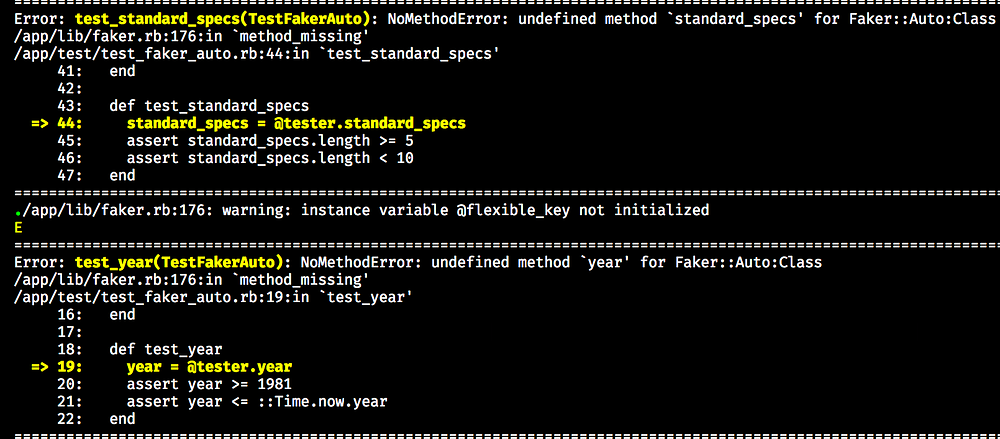
After we run rake test we get this output:
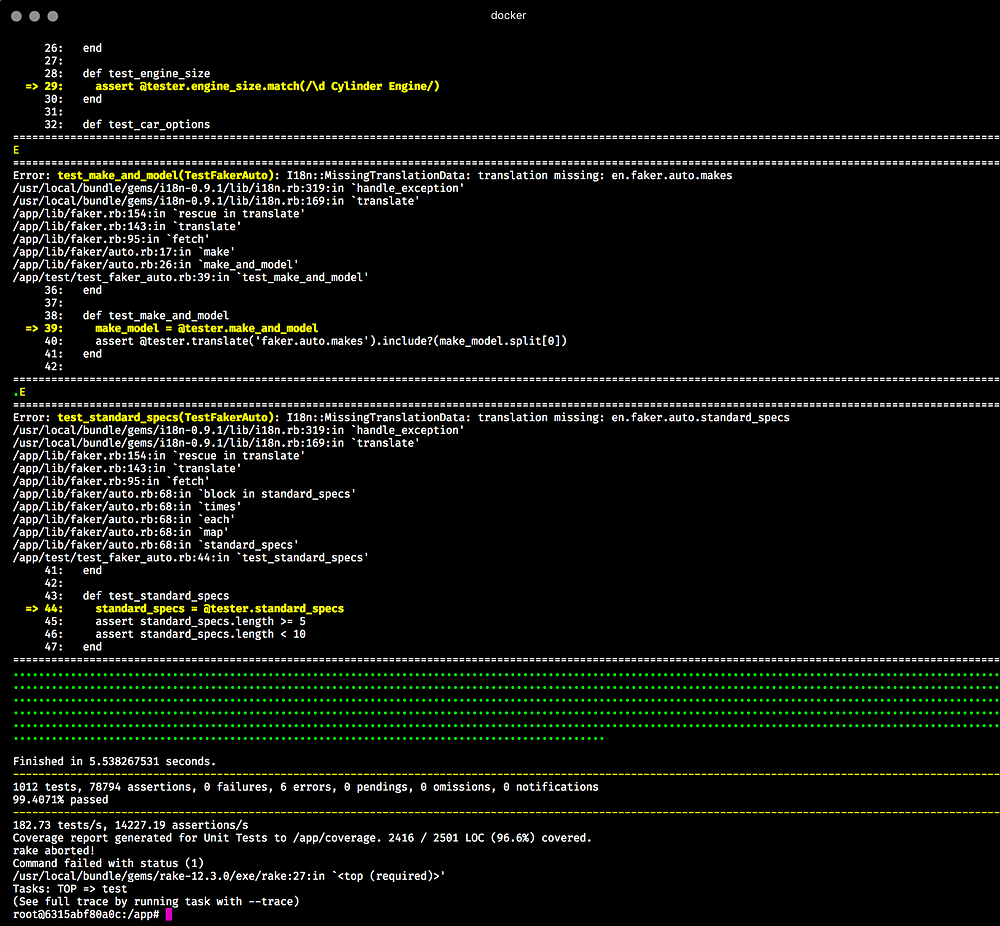
Okay, okay…so a few things have broken.
Stop! 🛑
You know you have to migrate these methods to Faker::Vehicle anyway, so you’d be tempted to just move it along and fix issues at the same time. However, I find it less stressful to tackle one problem at a time. And the problem we have now, is that the tests fail. So we should get these tests passing before we consider anything else 😬
Lets fix those broken tests 👨💻
If you remember, we removed a bunch of stuff from en.yml. This is what is probably causing the translation missing errors. So we need to add those back in.
We’ll follow the convention that all the other faker modules use. We will add a new file called auto.yml into the lib/locales/en folder. Because we deleted all the data out of the existing file, we can have a look at the original file on Github and extract the auto section and copy it into our new file.
And we can now run the tests again 🤞
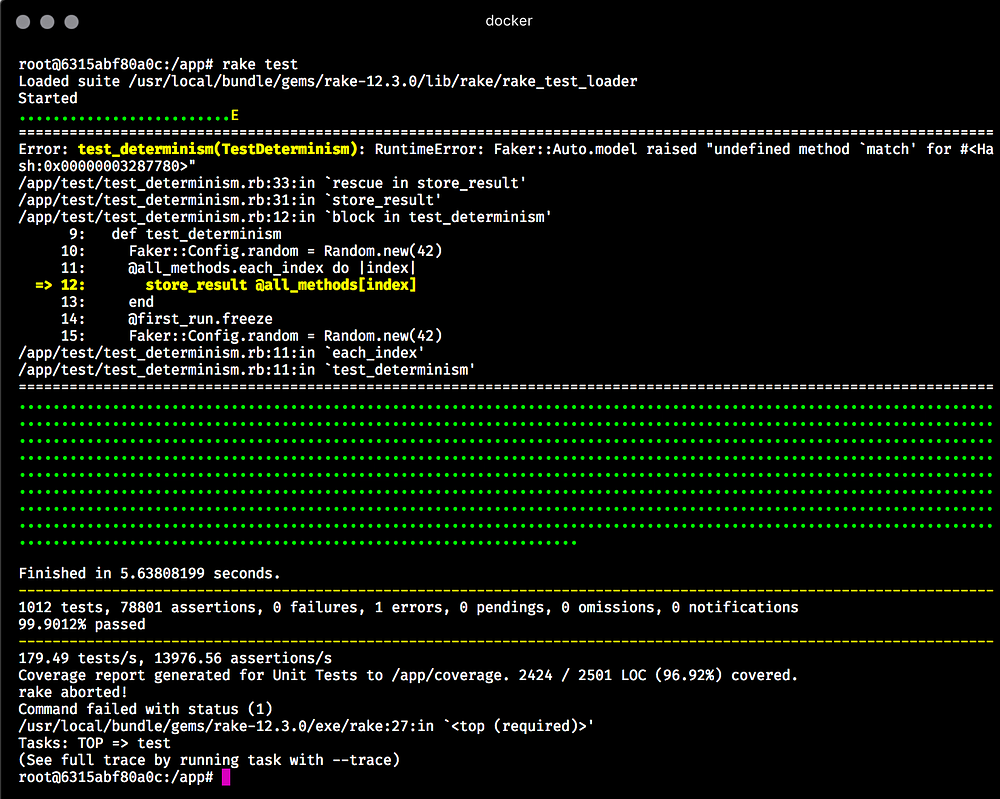
That looks a lot better 👍
One more test to fix!
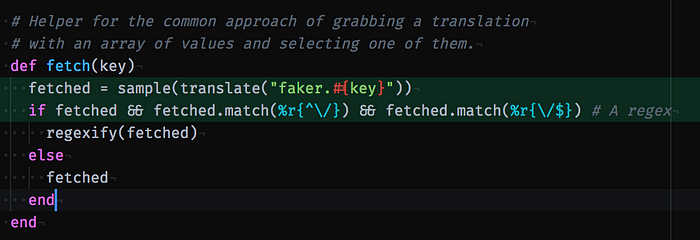
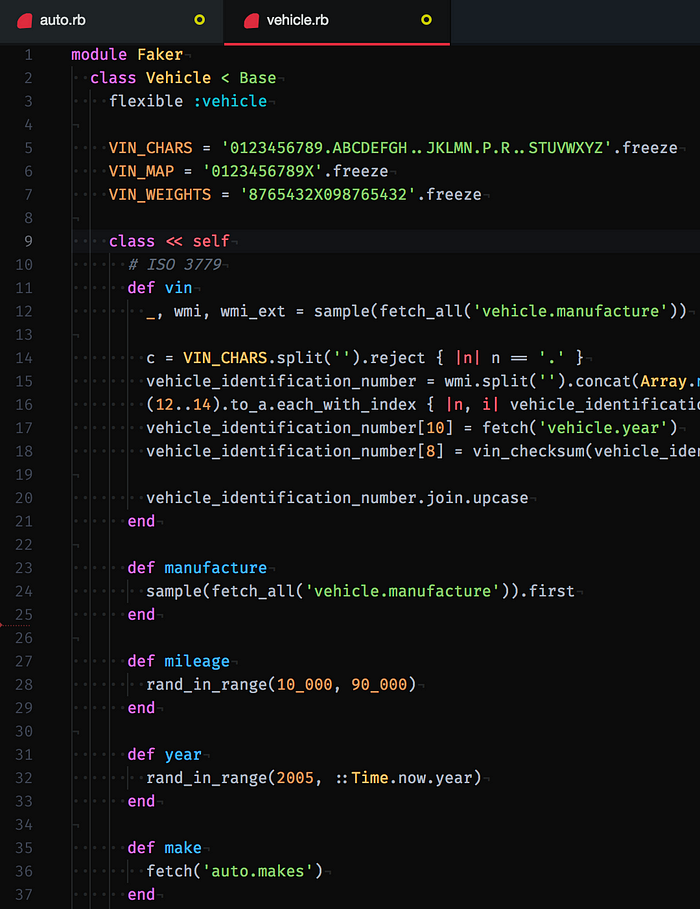
The error we get from this test is rather helpful. It is trying to call the match method on a Hash, which it can’t respond to. We also know where this is happening 🙌. And that is at Faker::Auto.model. So let’s have a look at the code.

Hmmmm…we don’t have a call to match in this method…maybe we need to dig into this fetch method 🤔

This looks familiar. We had to resolve a merge conflict with this method, and took the changes from the master branch. So I guess that broke it 😅.
But don’t rush to change it back…that is just how the library works now. If you change it back, you’ll probably end up with a lot more errors 🙈. Instead we just need to have a closer look at what the code is doing.
It looks like translate("faker.#{key}") should return part of the data file. So in the error we would be trying to fetch "faker.auto.models_by_make". We can debug this a little bit by using p so we can see what translate returns with that key.

And here is what we get when we run the tests again:
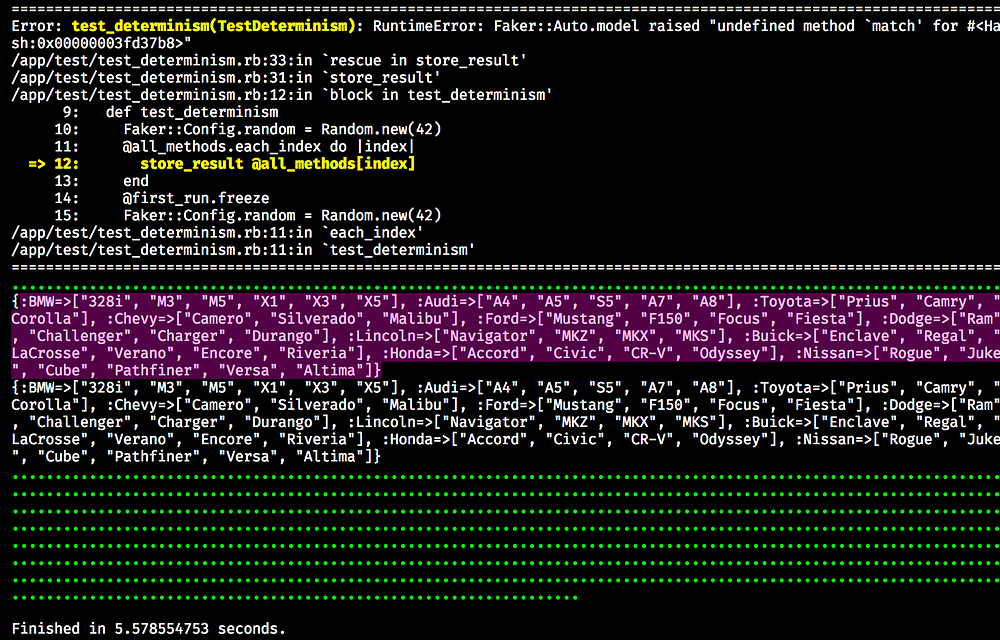
So it seems that translate returns a hash, which contains BMW, Audi etc. And then a call to sample would return that same hash 👀.
That doesn’t seem right…
And if we are returning a Hash…then that would explain the error message we are getting.
RuntimeError: Faker::Auto.model raised “undefined method `match’ for #<Hash:0x00000003fd37b8>”
So how do we fix this?
We can’t perform a match on a hash…this has been established. It turns out that the sample method is trying to extract an item from a list.

Given that our Hash wasn’t a list…it just returned it right back. So we need to make sure that what we pass to sample is an array of values. We can do this by refactoring the code slightly.
Take a look at the data in auto.yml. Does anything stand out?

The makes seem to relate to what is in the models_by_make section. So we can leverage that 🤔
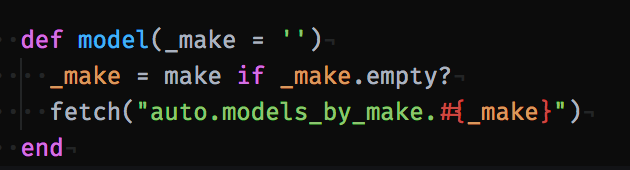
Now we are sending a key that maps to a list of strings. And as we’ve seen from the code, that will mean that when we call sample, we will get a single value back 👍
And when we run rake test again…
AWESOME! All the tests are passing 🙌.
Now we can get to work with migrating this functionality to Faker::Vehicle
Lets get cracking 🤓

Stage 1
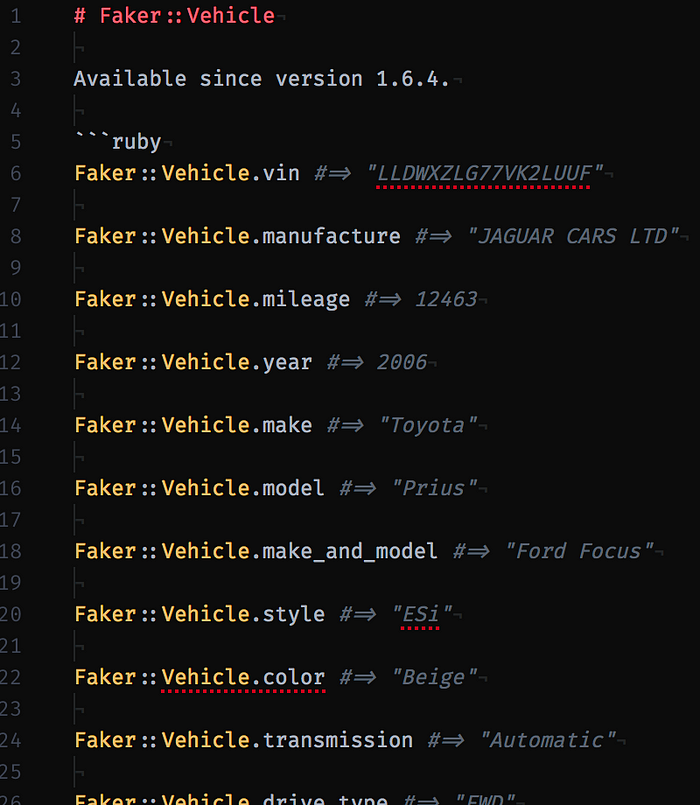
We want to add all these methods to Faker::Vehicle, so lets do it!
We didn’t need to move the vin method, because that was already in Faker::Vehicle 👍
When we run rake test again, we should see a bunch of errors, because we removed most of the methods from Faker::Auto 🙈
Step 2
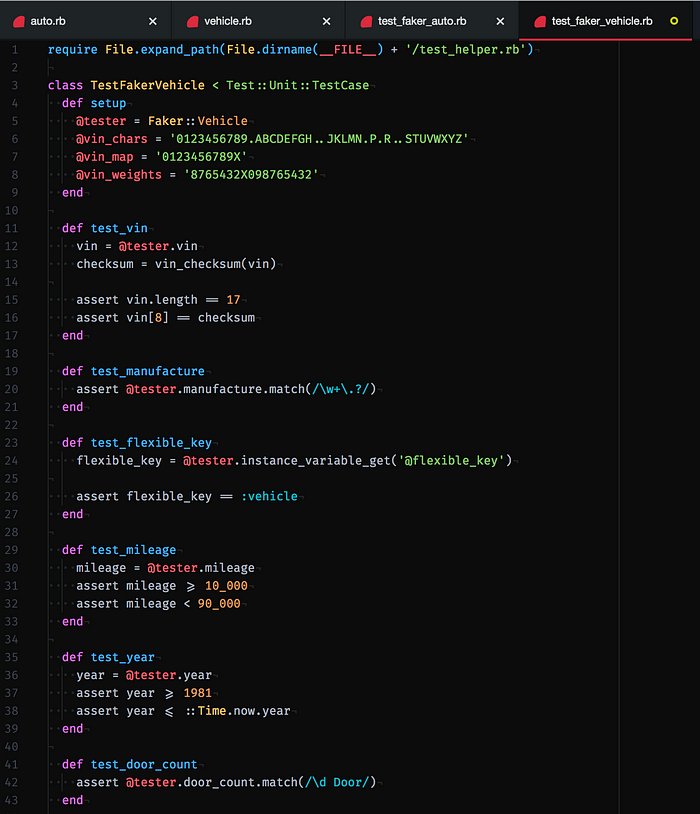
We now need to move the tests into the ones for Faker::Vehicle. So extract the tests from test/test_faker_auto.rb, and move them to test/test_faker_vehicle.rb.
And when we run the tests again…

Step 3
Update the documentation 😩.
There were no docs in this pull request, so we can just add the new methods to doc/vehicle.md.
This is a required step when adding new modules to the faker gem 😉
Step 4
My personal favourite…we can start deleting stuff! We can delete the following files:
- lib/faker/auto.rb
- test/test_faker_auto.rb

Step 5
You’d think we would be all done…nope! There are still a few tests missing for some of the methods. But if we follow the format of the other tests we can get this done pretty quickly.

Now I think we can call it a day 😎
Getting ready for the pull request
First we need to create a new commit for these changes. This is the way I’d do it normally, favouring small commits with a very specific message.
git add libgit add testgit commit -m "Moved methods from Faker::Auto into Faker::Vehicle and updated the tests"git add docgit commit -m "Updated Faker::Vehicle documentation with the new methodsgit push --set-upstream origin automotive
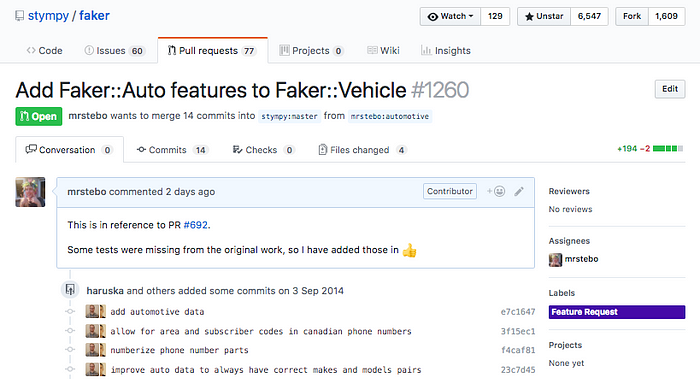
So we have created a few commits and pushed the changes to our own repository. Now we can create the pull request. For this we need to go to Github.
When we click New pull request we will be greeted by the following screen.

You may need to change the right-most dropdown to the automotive branch. Then you’ll start to see a list of the commits you’ve made. You’ll not have the View pull request item. You should have something that looks like this:

Once the pull request has been generated you should reference the previous pull request and mention what you have changed 👍.
Conclusion
Hopefully that has given you an insight into the processes that are involved in contributing to an open source project. You can take the majority of this with you on your Open Source journey in order to help others on theirs.