An Introduction to PayloadCMS


In today's digital landscape, having a robust system to manage and share content is pivotal for any organization. That's where a Content Management System (CMS) steps in, simplifying digital content creation, editing, and publishing. Throughout my experiences, I've noticed a common pitfall: it's startlingly easy to "bastardize" a CMS, turning it into something that strays from its main objective 🙈. This not only muddles the user experience but also takes away from the primary advantages a CMS is designed to offer.
It was at my current job that I first encountered PayloadCMS. The team had used it in a project, and the results? Intrigued, I delved deeper into its capabilities. To say I was impressed would be an understatement. The power and flexibility of PayloadCMS genuinely stood out, and it didn't take long for me to put it right at the top of my recommendations for a headless CMS. Of course, the CMS world is vast, with a plethora of options, but PayloadCMS holds a special place in my toolkit. Why? It's a platform I can swiftly spin up, ensuring I deliver value in no time 🚀.
Ease of Integration: PayloadCMS, being headless, seamlessly fits into any tech stack, granting developers the freedom to choose their preferred technologies.
Customizability: Unlike some CMS platforms that force developers into a rigid mould, PayloadCMS is refreshingly flexible. This ensures that specific project requirements can be met without the usual hoops and hurdles.
Efficient API Handling: The modern developer deals with APIs daily. PayloadCMS stands out with its efficient API management, streamlining the process and reducing development overheads.
Intuitive UI: No one wants to spend hours navigating a convoluted dashboard. PayloadCMS offers an interface that's both visually appealing and user-friendly – a win-win for content managers 🎉.
Versatility: Be it blog posts, videos, images, or custom content types, PayloadCMS handles it all with ease. This means content managers can focus on what they do best: creating engaging content.
Collaboration: In today's remote-working era, the ability to collaborate in real-time is priceless. PayloadCMS supports this, ensuring content teams can work together seamlessly, irrespective of their geographic locations.
Every CMS promises to make life easier, but not all deliver on that promise. From a developer's standpoint, the ideal CMS should be easy to integrate, customizable, and devoid of unnecessary complexities. For content managers, the dream is a platform that's intuitive, efficient, and versatile in handling different content types.
PayloadCMS bridges the gap between developers and content managers, delivering a harmonious experience catering to unique needs. It's not just about managing content; it's about doing it smartly, efficiently, and with flair.
Key Features

Before diving into the features of Payload, I want to acknowledge something. While the list might sound a bit "market-y" at first glance, there's genuine substance behind each point. I've worked with numerous CMS platforms that boast long lists of features, many of which collect digital dust because they're simply irrelevant. What sets Payload apart is its lean and purposeful feature set. You don't get overwhelmed with extras that offer no real-world utility. Instead, every feature in Payload serves a clear purpose, and in my experience, you'll find yourself tapping into almost 100% of its capabilities when using it for your projects.
Headless Approach

Payload is a headless CMS, which means it focuses exclusively on what it excels at—managing content. It provides administrators with an efficient content creation and maintenance platform without dictating how or where that content is displayed. By keeping content management separate from its presentation, Payload frees creative teams from constraints, allowing them to harness the power of modern interface libraries like React and Vue. I'll include an example of how easy that is later on in this post.
Out-of-the-Box Solutions
Payload comes packed with features that cater to a wide range of development needs:
- MongoDB Database: A robust platform to store your data.
- REST and GraphQL APIs: Tools to store, retrieve, and manipulate data of diverse shapes.
- Authentication: Comes with critical functionalities like registration, email verification, login, and password reset.
- Deep Access Control: Offers both document and field-level control functions.
- File Storage: Efficient file storage and access control mechanisms.
- Tailored Admin UI: A visually captivating admin user interface specifically crafted for your data.
Why Choose Payload?
Having built websites and apps with various CMSs for over a decade, the team behind Payload recognized the gaps in existing solutions. Payload is designed to be:
- Cost-effective: It aims to save both time and money.
- Intuitive: Crafted for developers and content creators alike.
- Self-hosted: Allows hosting as per the application's requirements.
- No Coding Experience Needed: Designed in code but usable without any coding know-how.
- Blazing Speed: Efficiency is at its core.
- Security: Built with security in mind.
- Fully Flexible and Extensible: Adaptable to evolving needs.
Moreover, Payload integrates the best of CMS and app frameworks, providing an array of features such as content localization, local file storage, flexible access control, block-based layout building, and much more.
Understanding PayloadCMS Concepts

PayloadCMS operates on a straightforward yet powerful set of concepts. Each element has been meticulously designed to be intuitive and concise, ensuring that developers can harness the full potential of the CMS without unnecessary complexities. Let's dive into these core concepts:
Config 🛠️
The Config in PayloadCMS isn't just a mere setting; it's the core from where you breathe life into your CMS. By default, the Payload config comfortably resides in the root folder of your project and proudly wears the name payload.config.js — or payload.config.ts if you're a TypeScript aficionado. The beauty of it? You aren't bound by these defaults. Whether you want to rename it or relocate it, the choice is yours. But here's where it truly shines: the Config doesn't limit you to mere settings. Imagine embedding full functions or even weaving in complete React components directly into your config! That's the power and flexibility at your fingertips.
Collections 🗂️
Think of Collections as customizable containers that shape and nurture your data. They don't just store your data; they define its very essence. Each collection contains numerous "documents," which dance to the same tune, sharing the same attributes and functionalities. From managing posts, events, users, to transactions, Collections are the backbone of your data needs in PayloadCMS.
Globals 🌍
Globals bring uniqueness to the table. While they might seem similar to Collections in many respects, there's a distinct difference: while Collections can house numerous documents, a Global is unique. Just one. This makes them ideal for storing data that doesn’t vary, like overarching site configurations, metadata, or perhaps a site's primary theme.
Fields 📌
Fields in PayloadCMS are like the atoms of your universe. They are the foundational building blocks that shape the data, giving form and structure to both Collections and Globals. The platform offers a plethora of field types, ensuring that you have the flexibility and tools to design an API that's tailored to your exact requirements.
Hooks 🎣
Imagine wanting to interject a touch of custom behaviour into the CMS’s operations. Hooks are your answer. They act as personal touchpoints, letting you "tie into" existing Payload actions. Whether you wish to send a celebratory email every time a new order is placed or tweak the system's behaviour under certain conditions, Hooks provides the versatility and power to make it happen.
Access Control 🛡️
In the vast kingdom of your PayloadCMS, not everyone should have the keys to every door. Access Control is the vigilant guardian that ensures this. Instead of forcing a one-size-fits-all approach, PayloadCMS grants you the tools to define who gets to do what. Whether you're aiming for a nuanced role-based access control (RBAC) system or crafting a custom pattern to fit a unique requirement, PayloadCMS stands ready to adapt.
Depth ⚓
Data is often intertwined and connected in ways that necessitate efficient retrieval mechanisms. Depth is that control tool in PayloadCMS, ensuring you retrieve related data with precision. You have a clear say in system efficiency and resource utilisation by controlling how many levels down related documents should be populated when retrieved.
It's crucial to emphasize that each of these concepts, though comprehensive, is designed with simplicity in mind. For instance, understanding "depth" allows developers to make precise data retrieval requests, ensuring efficient operations and optimal system performance.
Installation and Setup

When it comes to local development, I've always been an advocate for a clean approach: install only what's vital. This philosophy wasn't born out of thin air; it’s the result of skirmishes with configuration discrepancies between local and deployed environments, with databases being the usual suspects.
Enter Docker: my saving grace. Docker allows me to run projects in isolation, effectively siloing all its configurations and nuances. This ensures that I don't have projects interfering with one another, and more importantly, it mirrors the exact conditions of my deployed applications. While I've encountered peers who are wary of Docker, mainly due to its resource demands, for me, it's been a game-changer, ensuring consistency and eliminating cross-configuration woes.
- Yarn or NPM
- Node.js (version 14 or above)
- A MongoDB Database
In order to create the Payload project with Docker you can use the following command:
docker run -it --rm -v $PWD:/app -w /app node npx create-payload-app cmsProjects initiated with create-payload-app come pre-equipped with both a Dockerfile and a docker-compose.yml. Not only do these tools ensure a harmonious local development experience, but they're also invaluable when deploying PayloadCMS to platforms that thrive on running containers. Whether you're launching on AWS, Northflank, Azure, or any other container-supportive platform, these Docker configurations are tailored to make your deployment smooth and hassle-free. For a deeper dive and best practices, I'd recommend going through the Deployment documentation provided by Payload.
Setting up the project
Initiating the setup process, we begin with the Docker command to kickstart the PayloadCMS project.
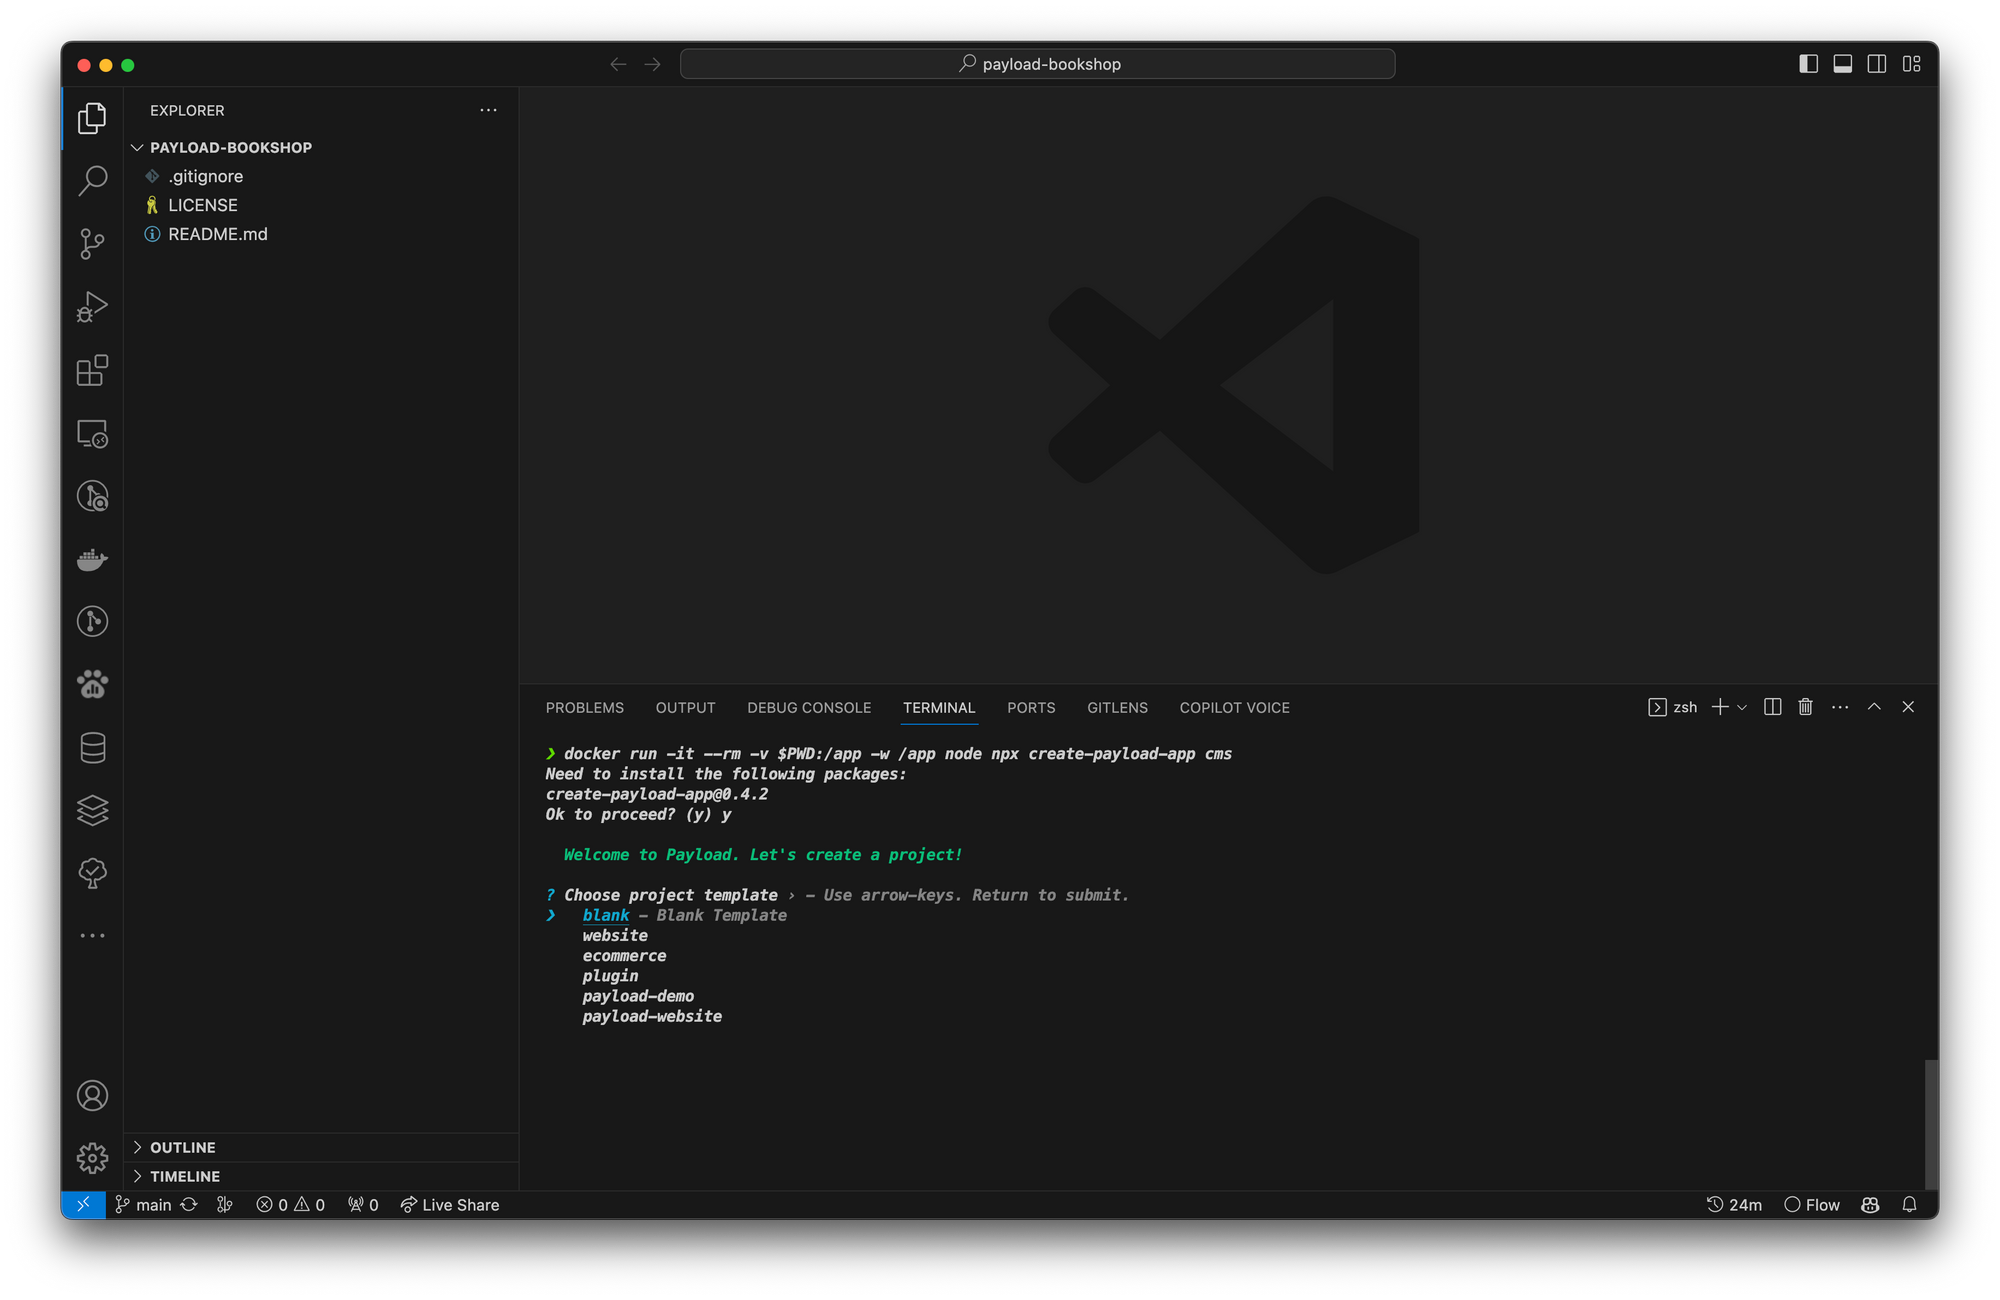
When prompted on the type of project we wish to embark upon, our choice is clear: the "blank" template. It allows us the freedom to mould PayloadCMS from scratch.
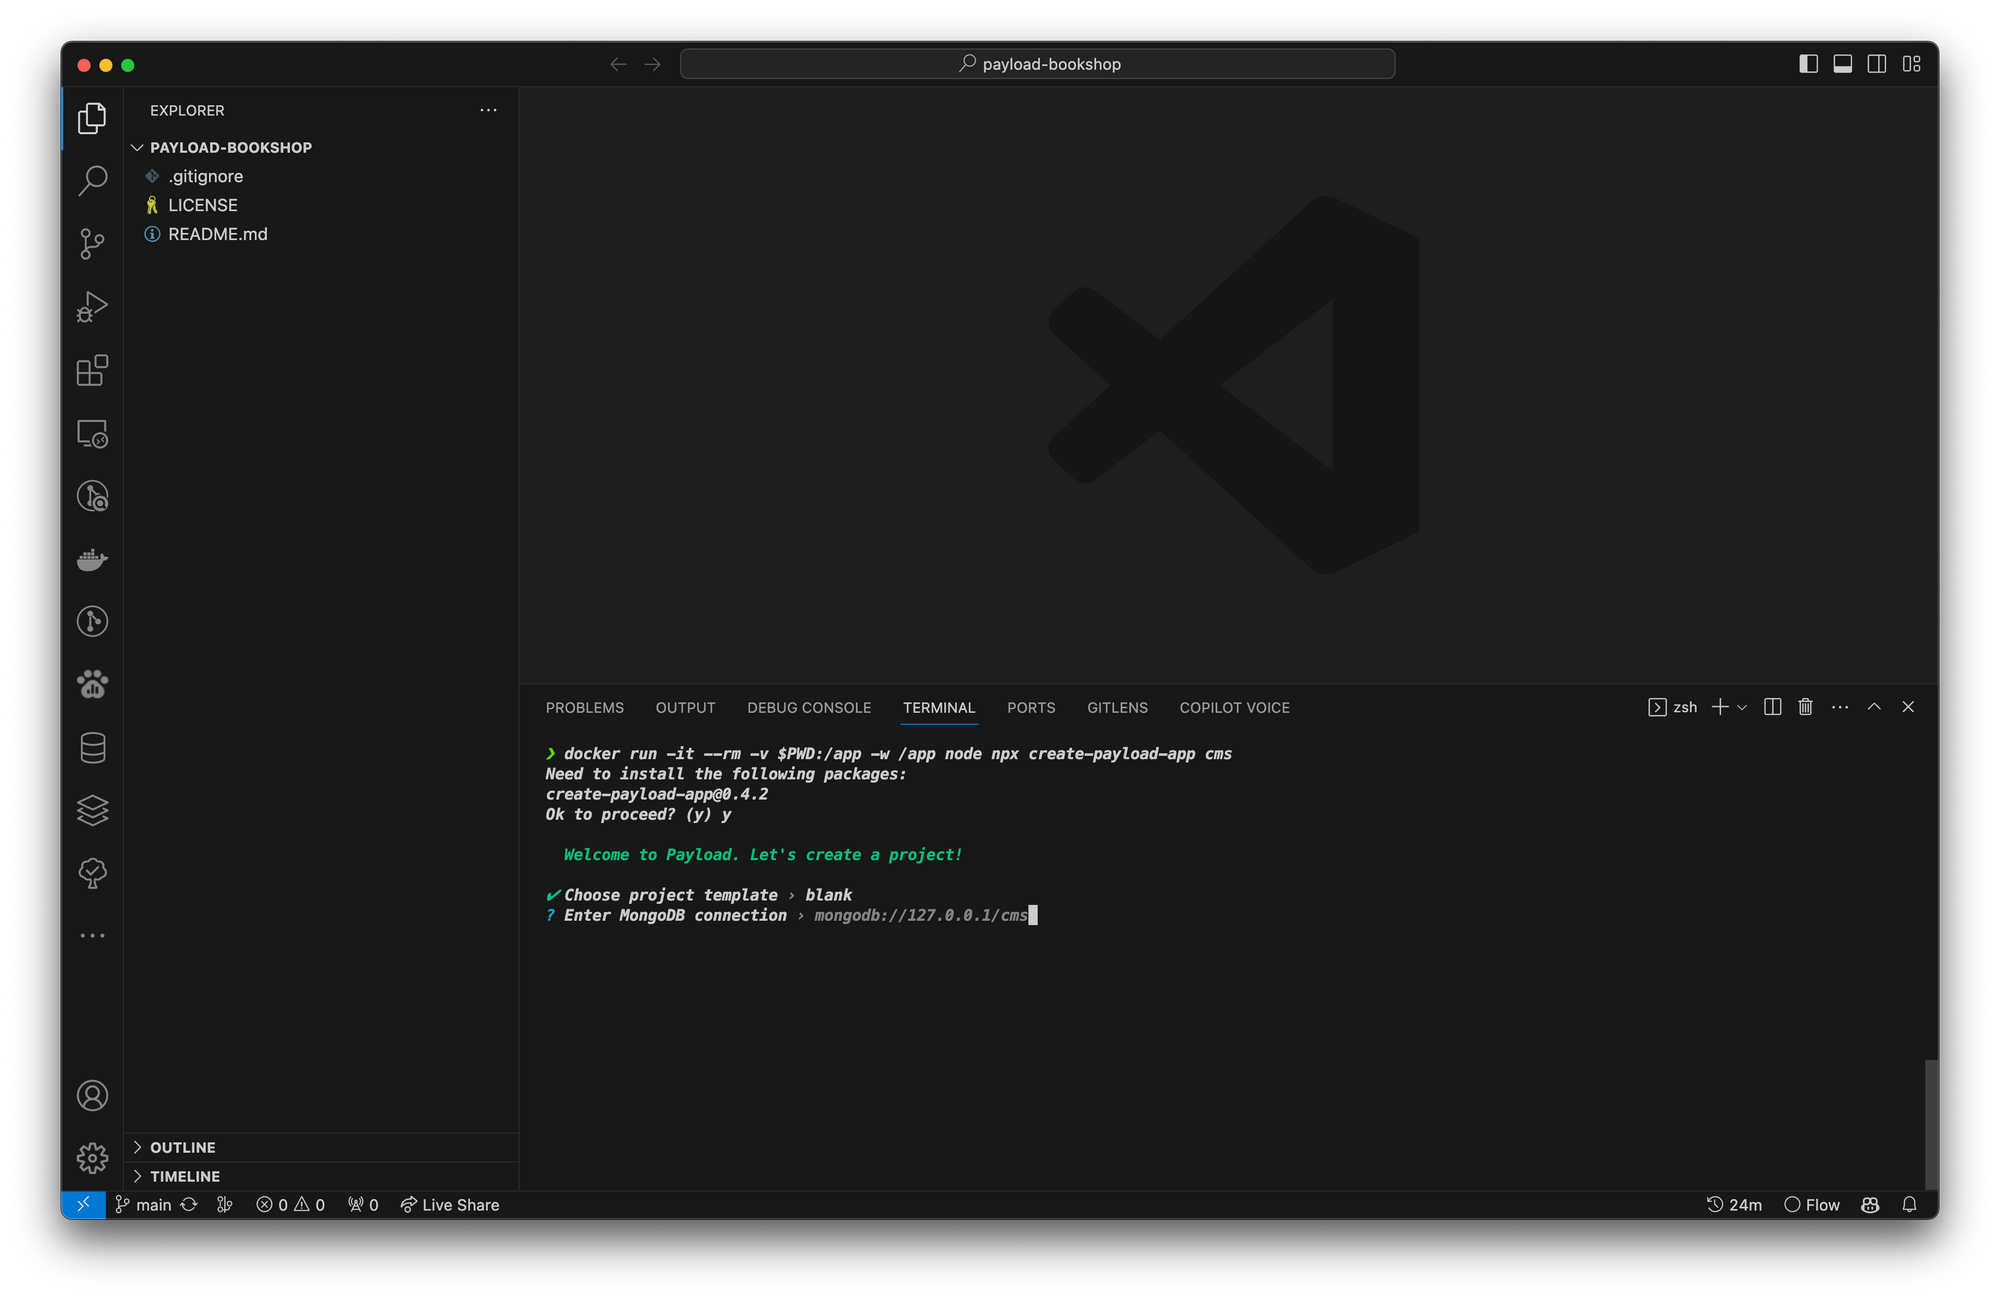
The subsequent step brings us to the Mongo connection. For now, we will use the default it gives us.
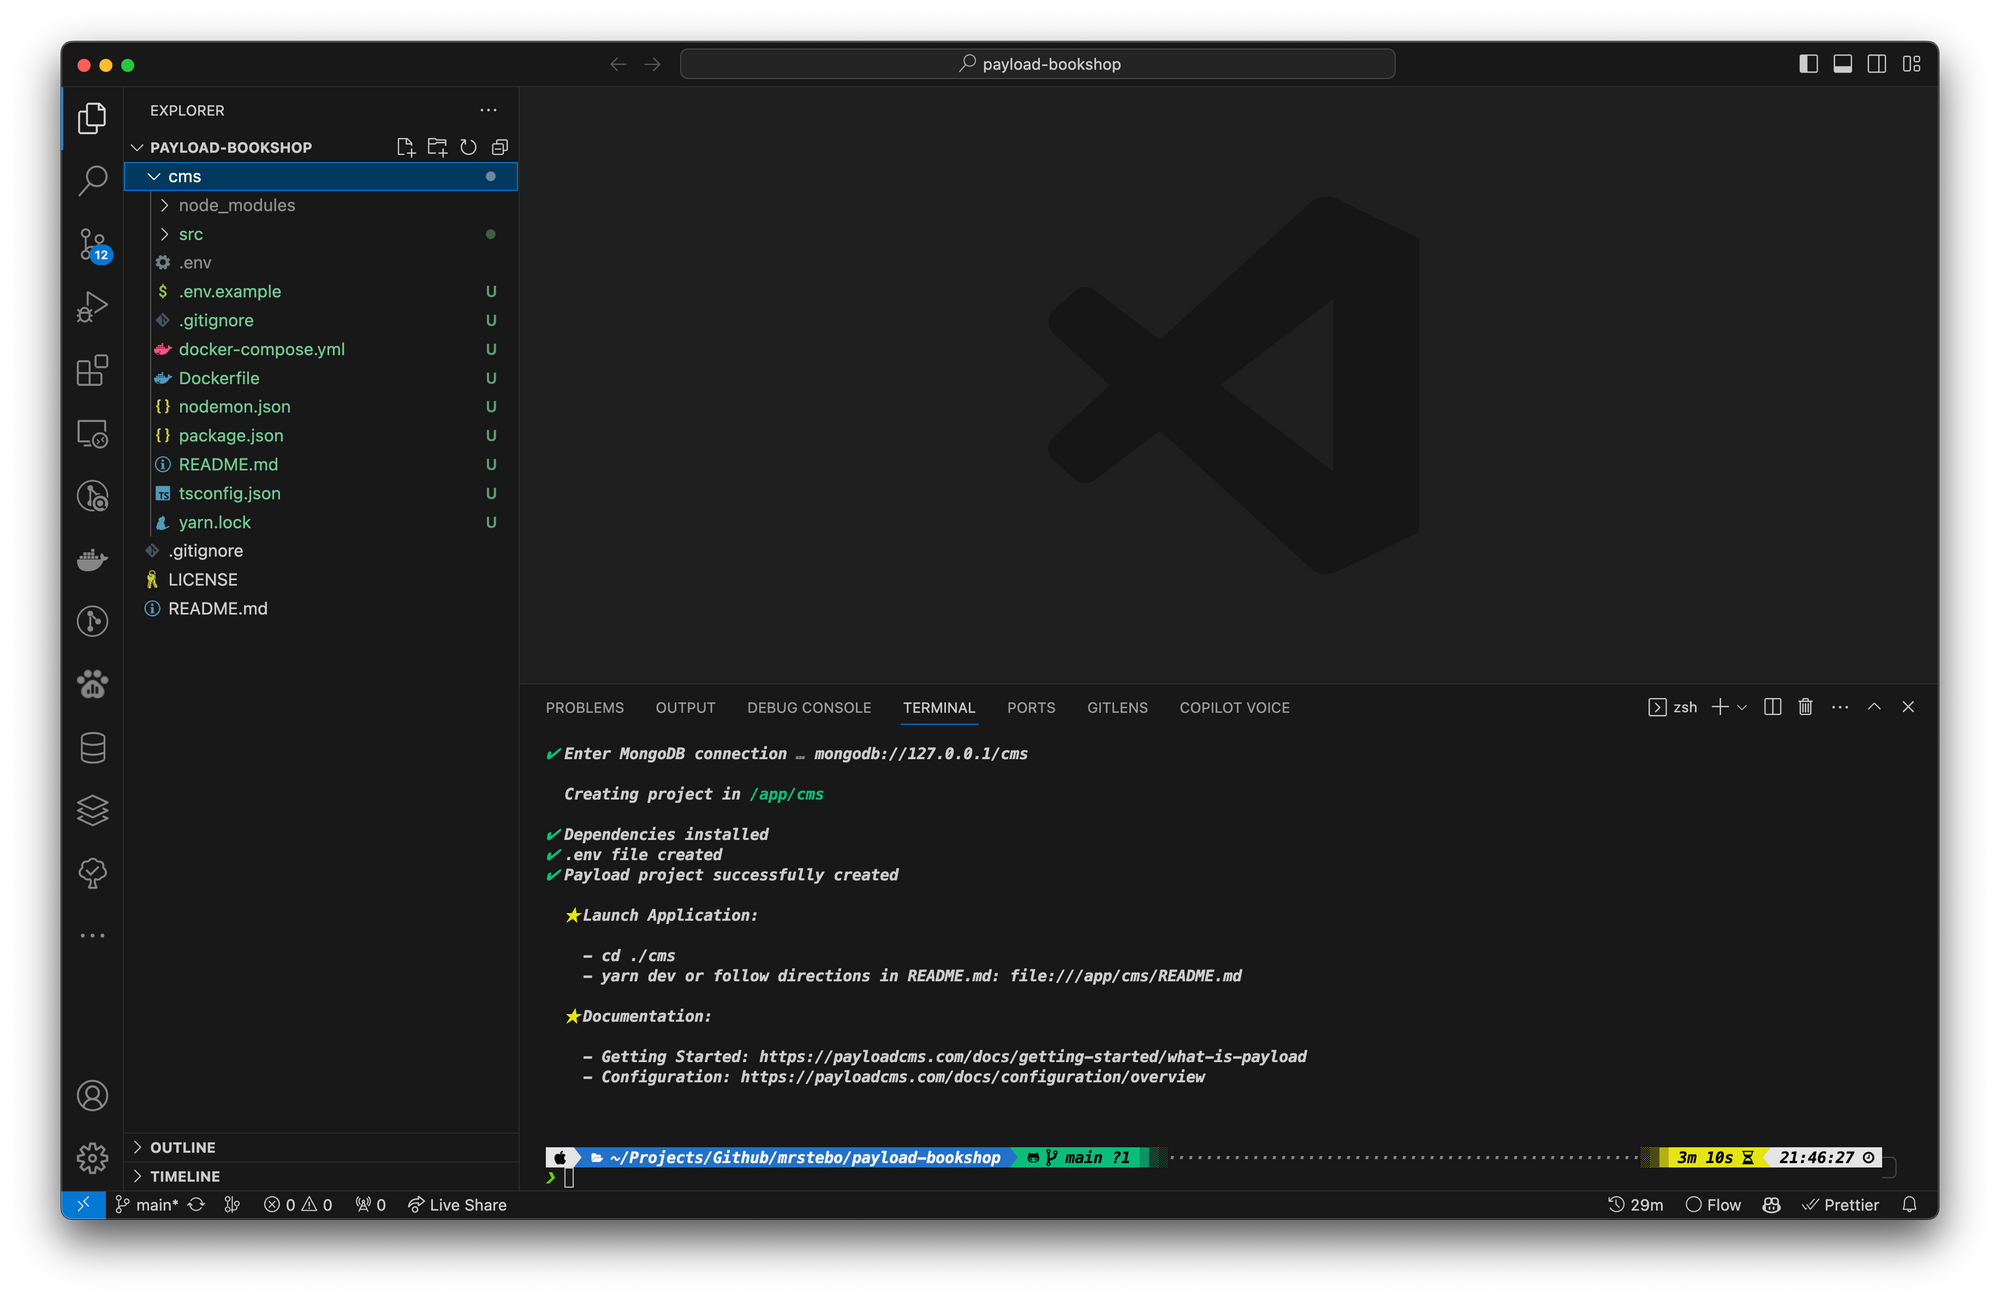
Once the steps have been completed, the CLI guides us on launching Payload. But since we will be running this using Docker, we have other plans. Our project will run but within the pristine confines of a Docker container.
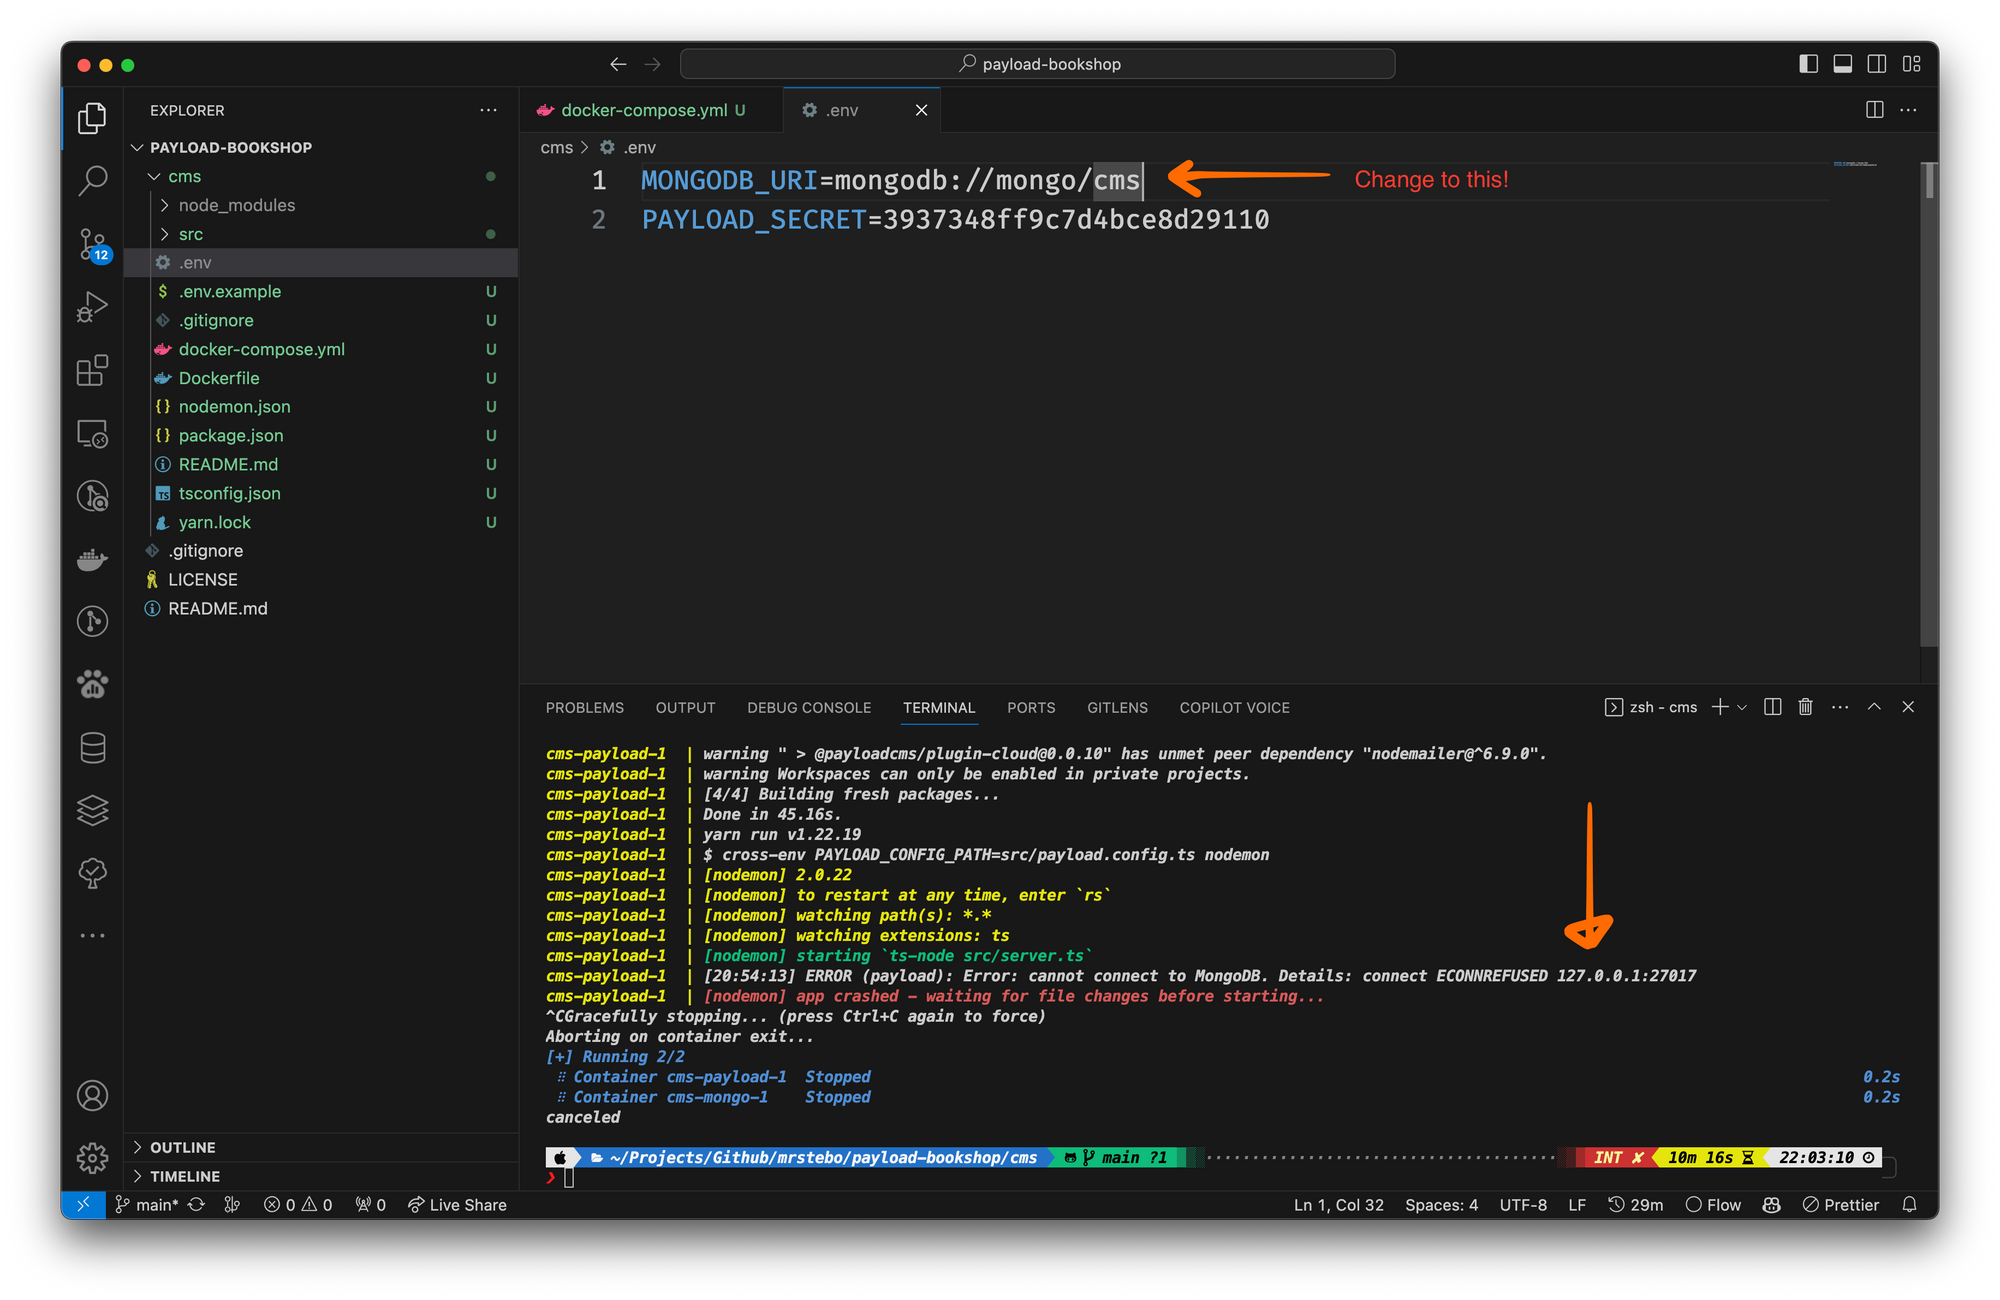
Whoops... the initial Mongo configuration we specified will not work within the container. So the .env file will need to be updated to point to the container, rather than to the local machine.
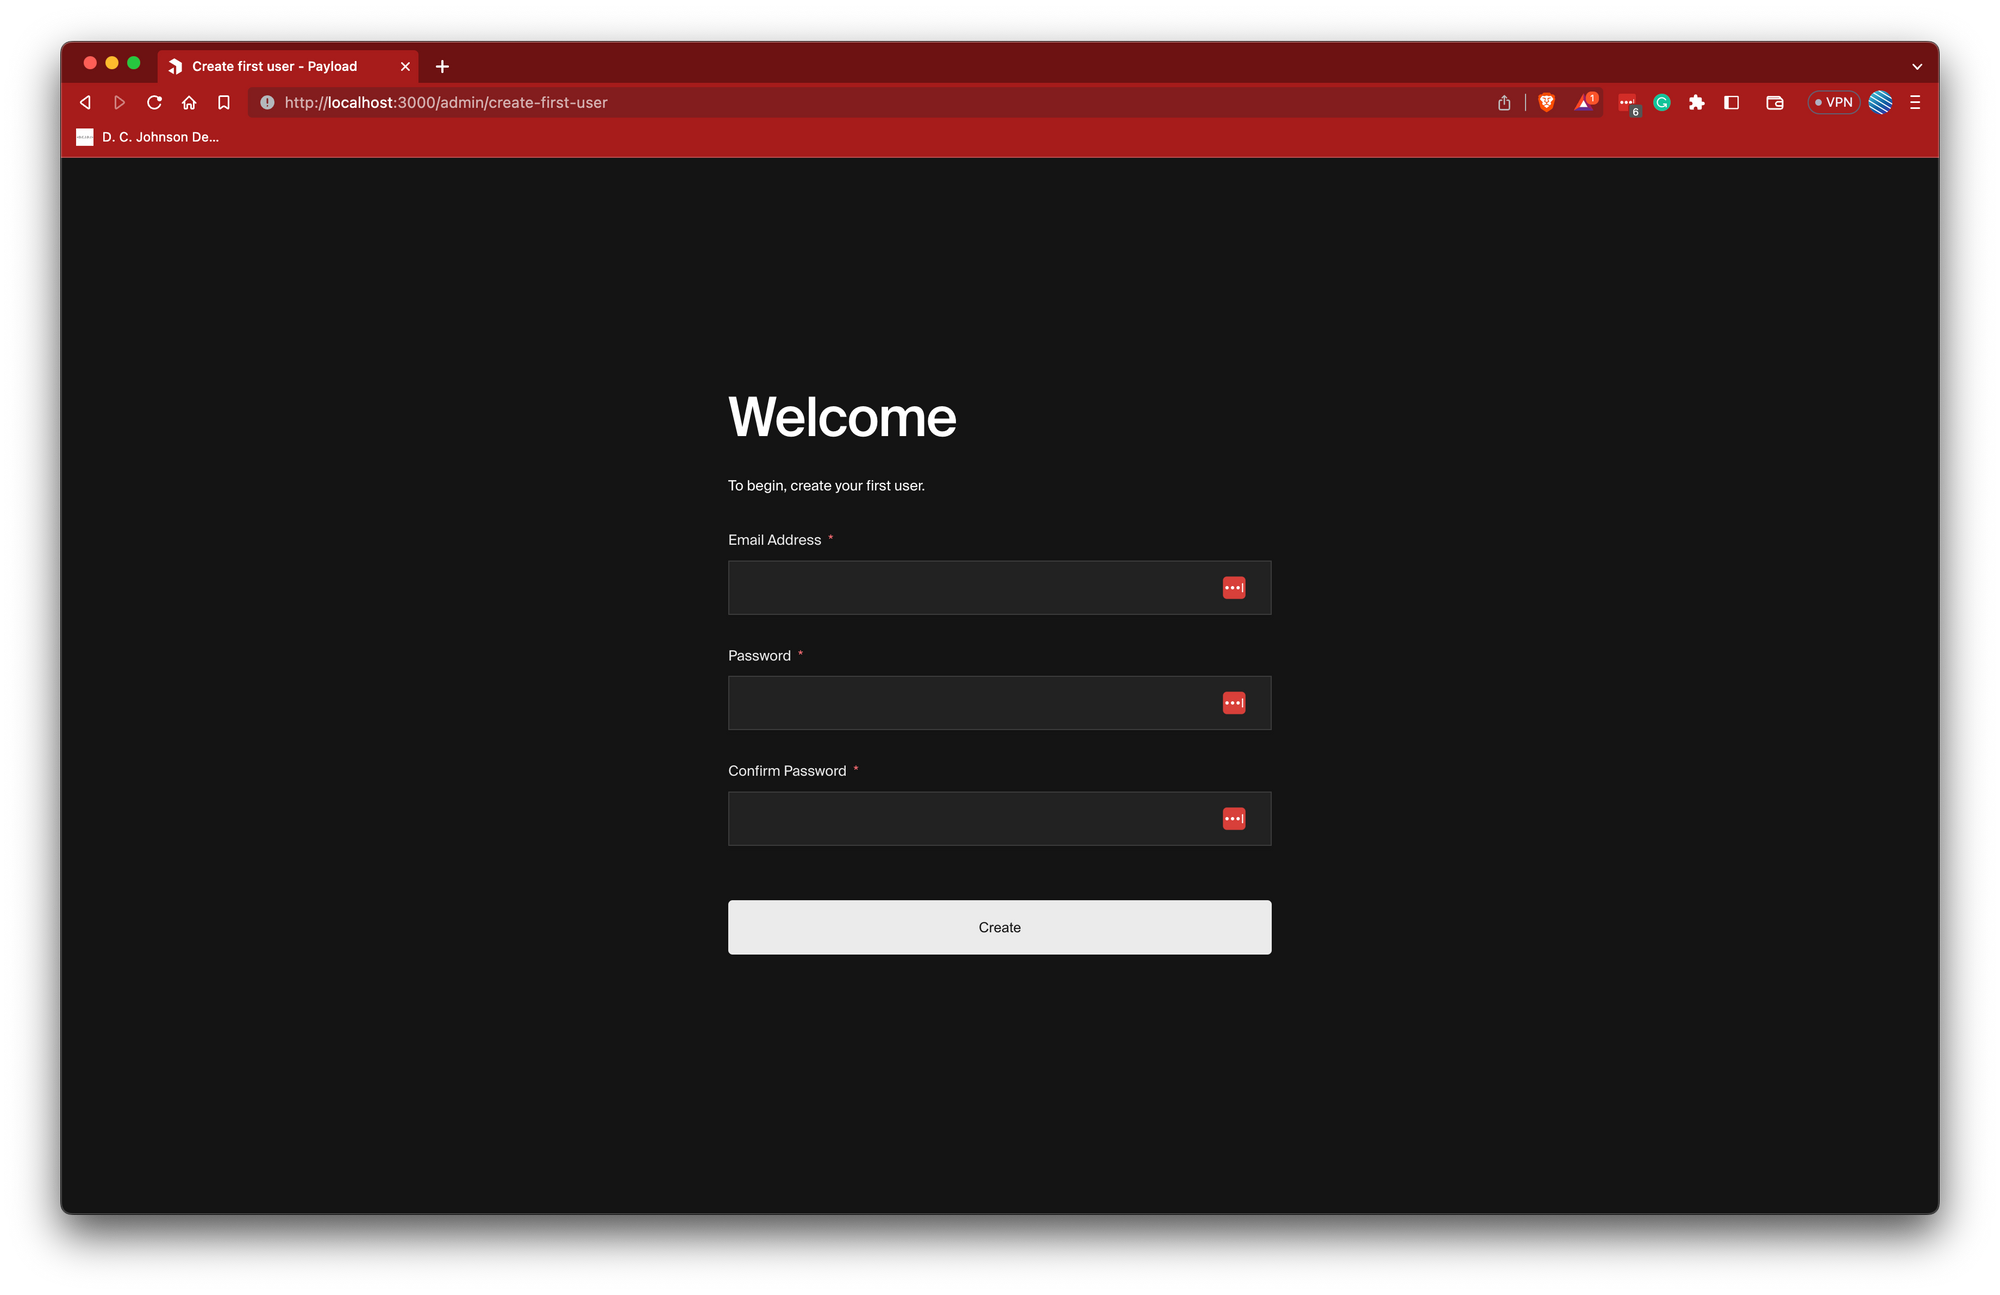
Now that we have solved that problem, we can navigate to our running Payload instance! 🎉
We have to create our first account so that we can log in to the admin area.

We end up on a "Not Found" page because we haven't built up a dashboard yet. We will talk about that in future posts; don't worry. ☺️
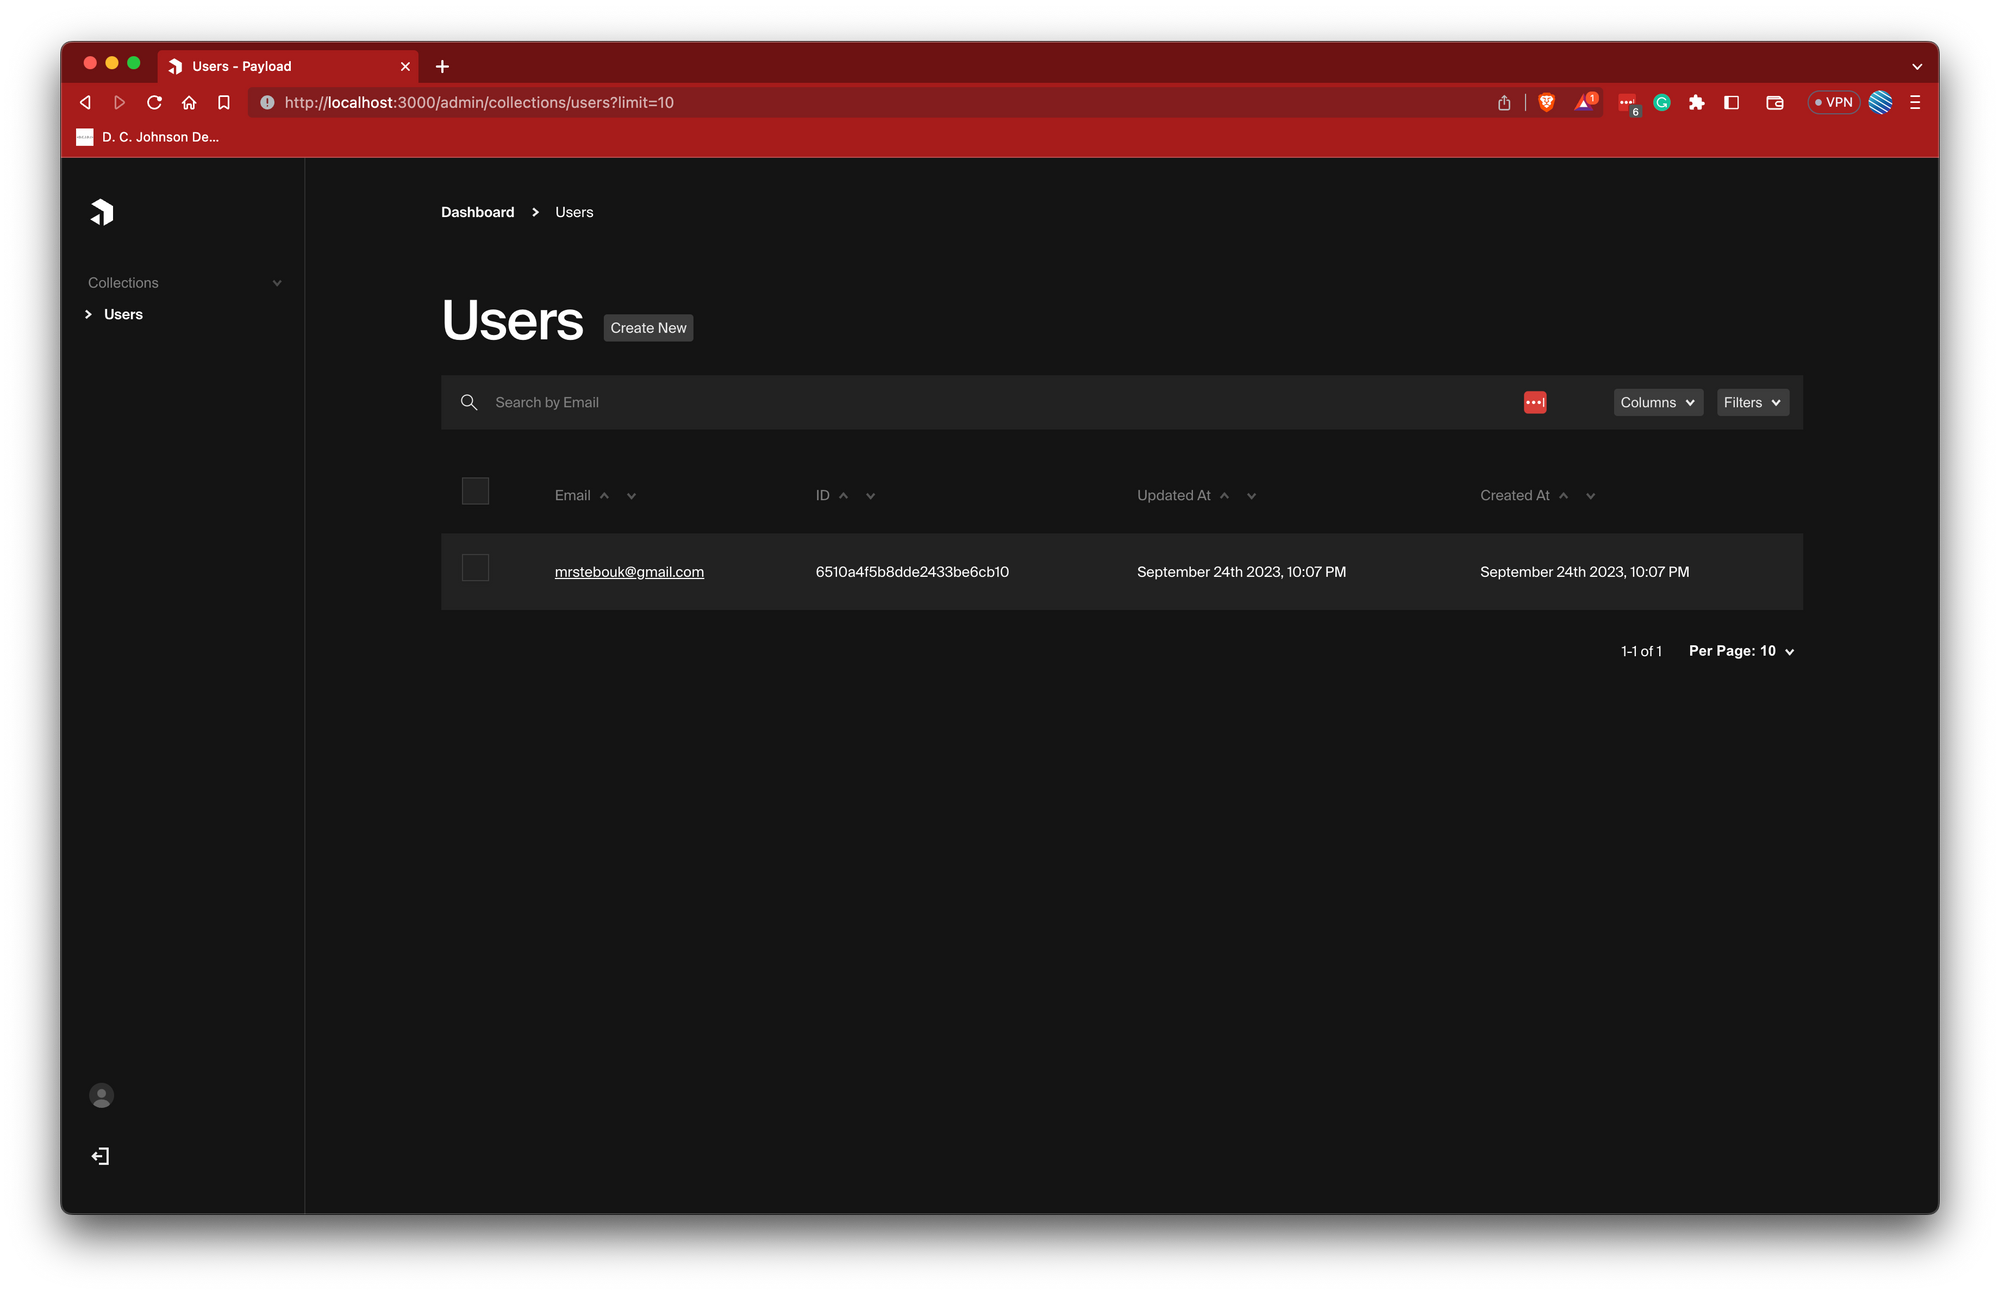
When we take a look at the Users collection, we see the user that we have just created.
Creating Collections
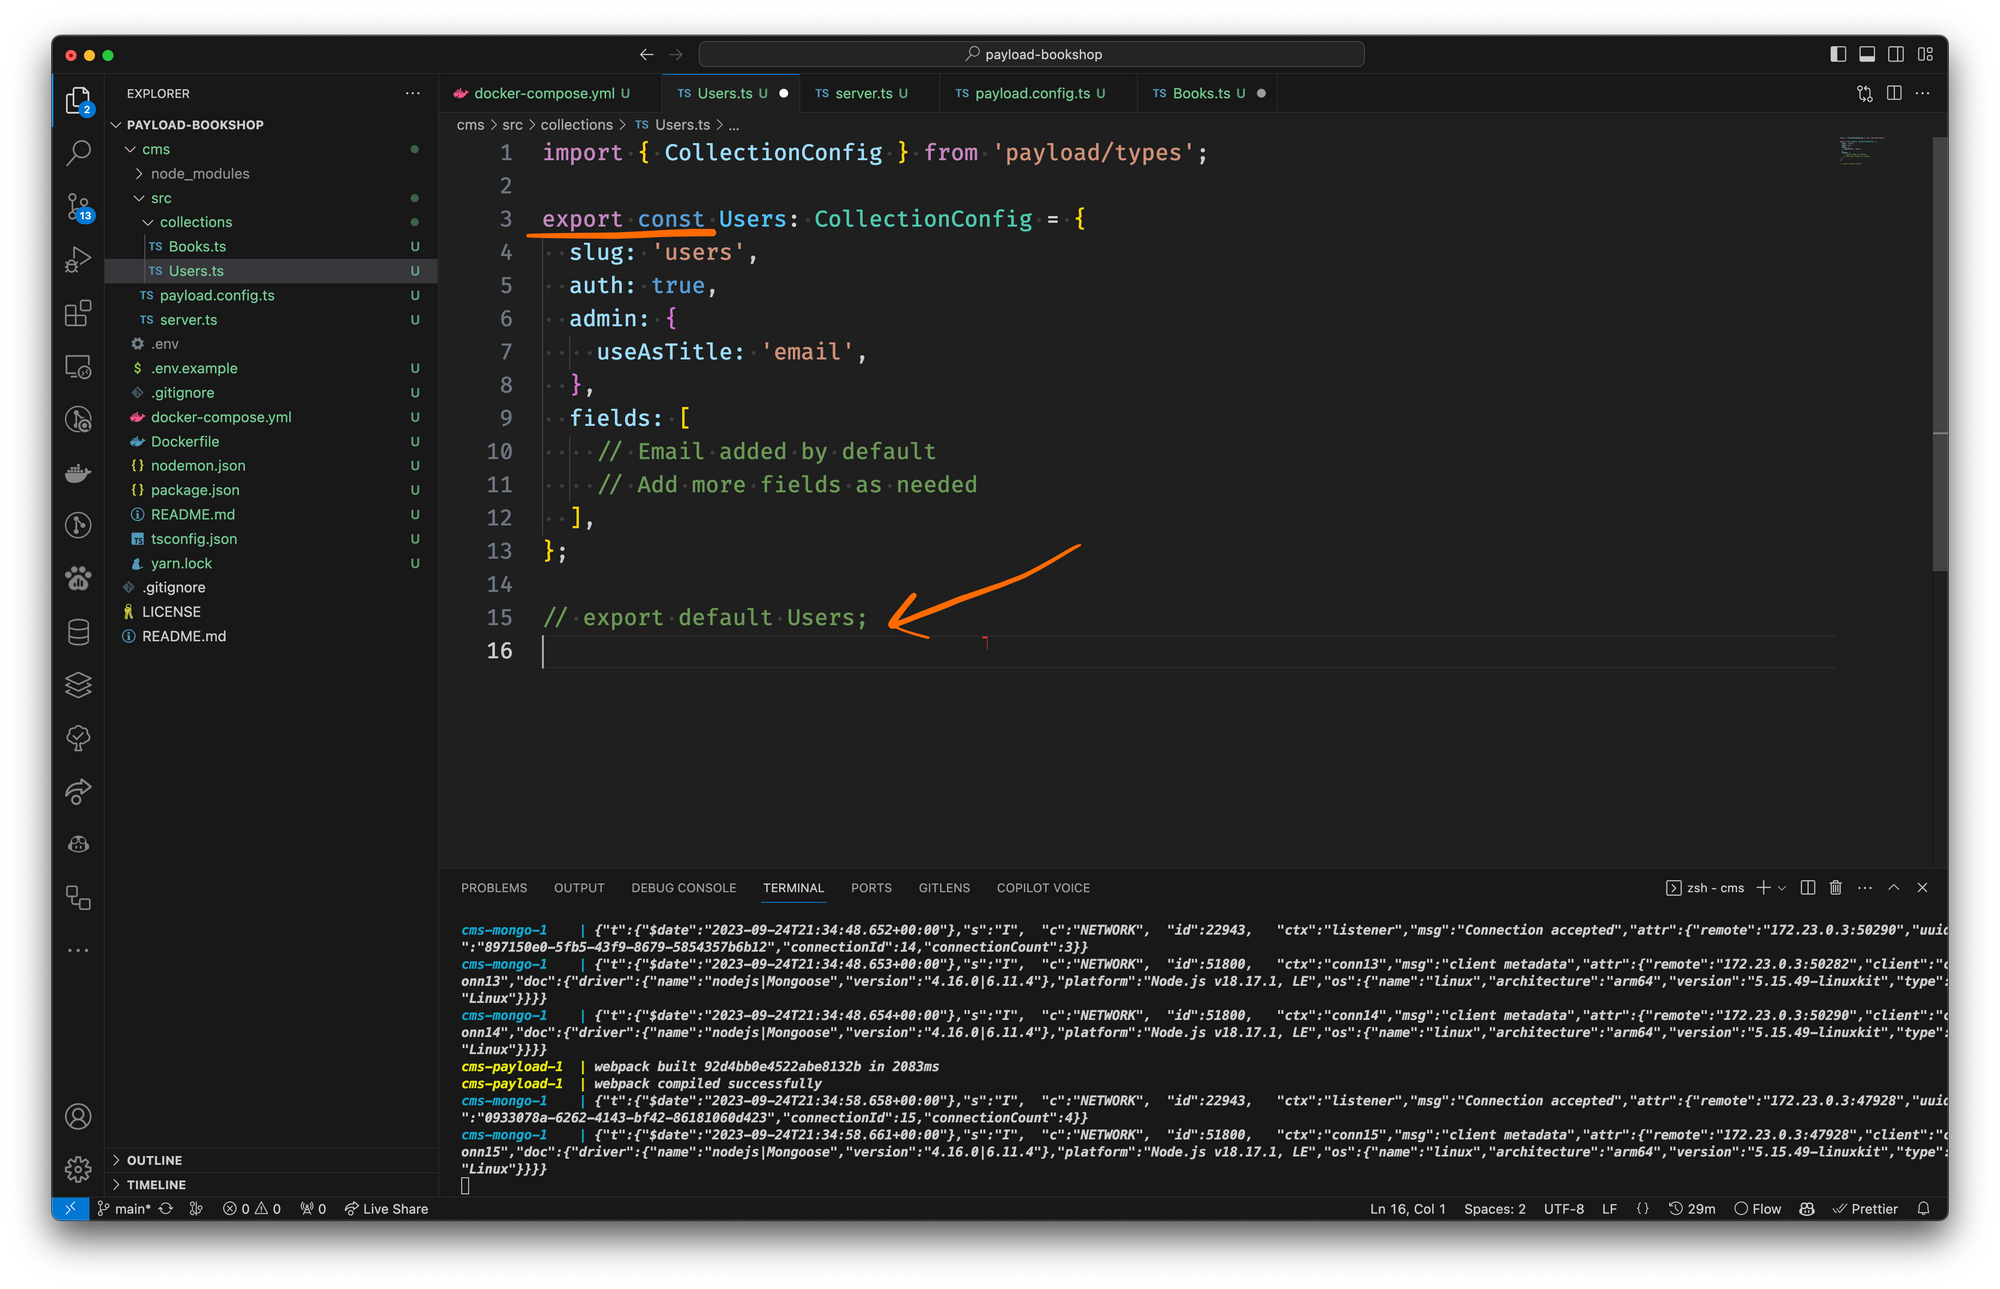
You can see below that we have a simple Users collection config. This is what was used when we created our initial admin user. Of course, you don't have to stick with this convention. A lot of the time, I end up creating an Admins collection for storing the users that can access the CMS. Then, I'll delegate a new Users collection for other types of users.
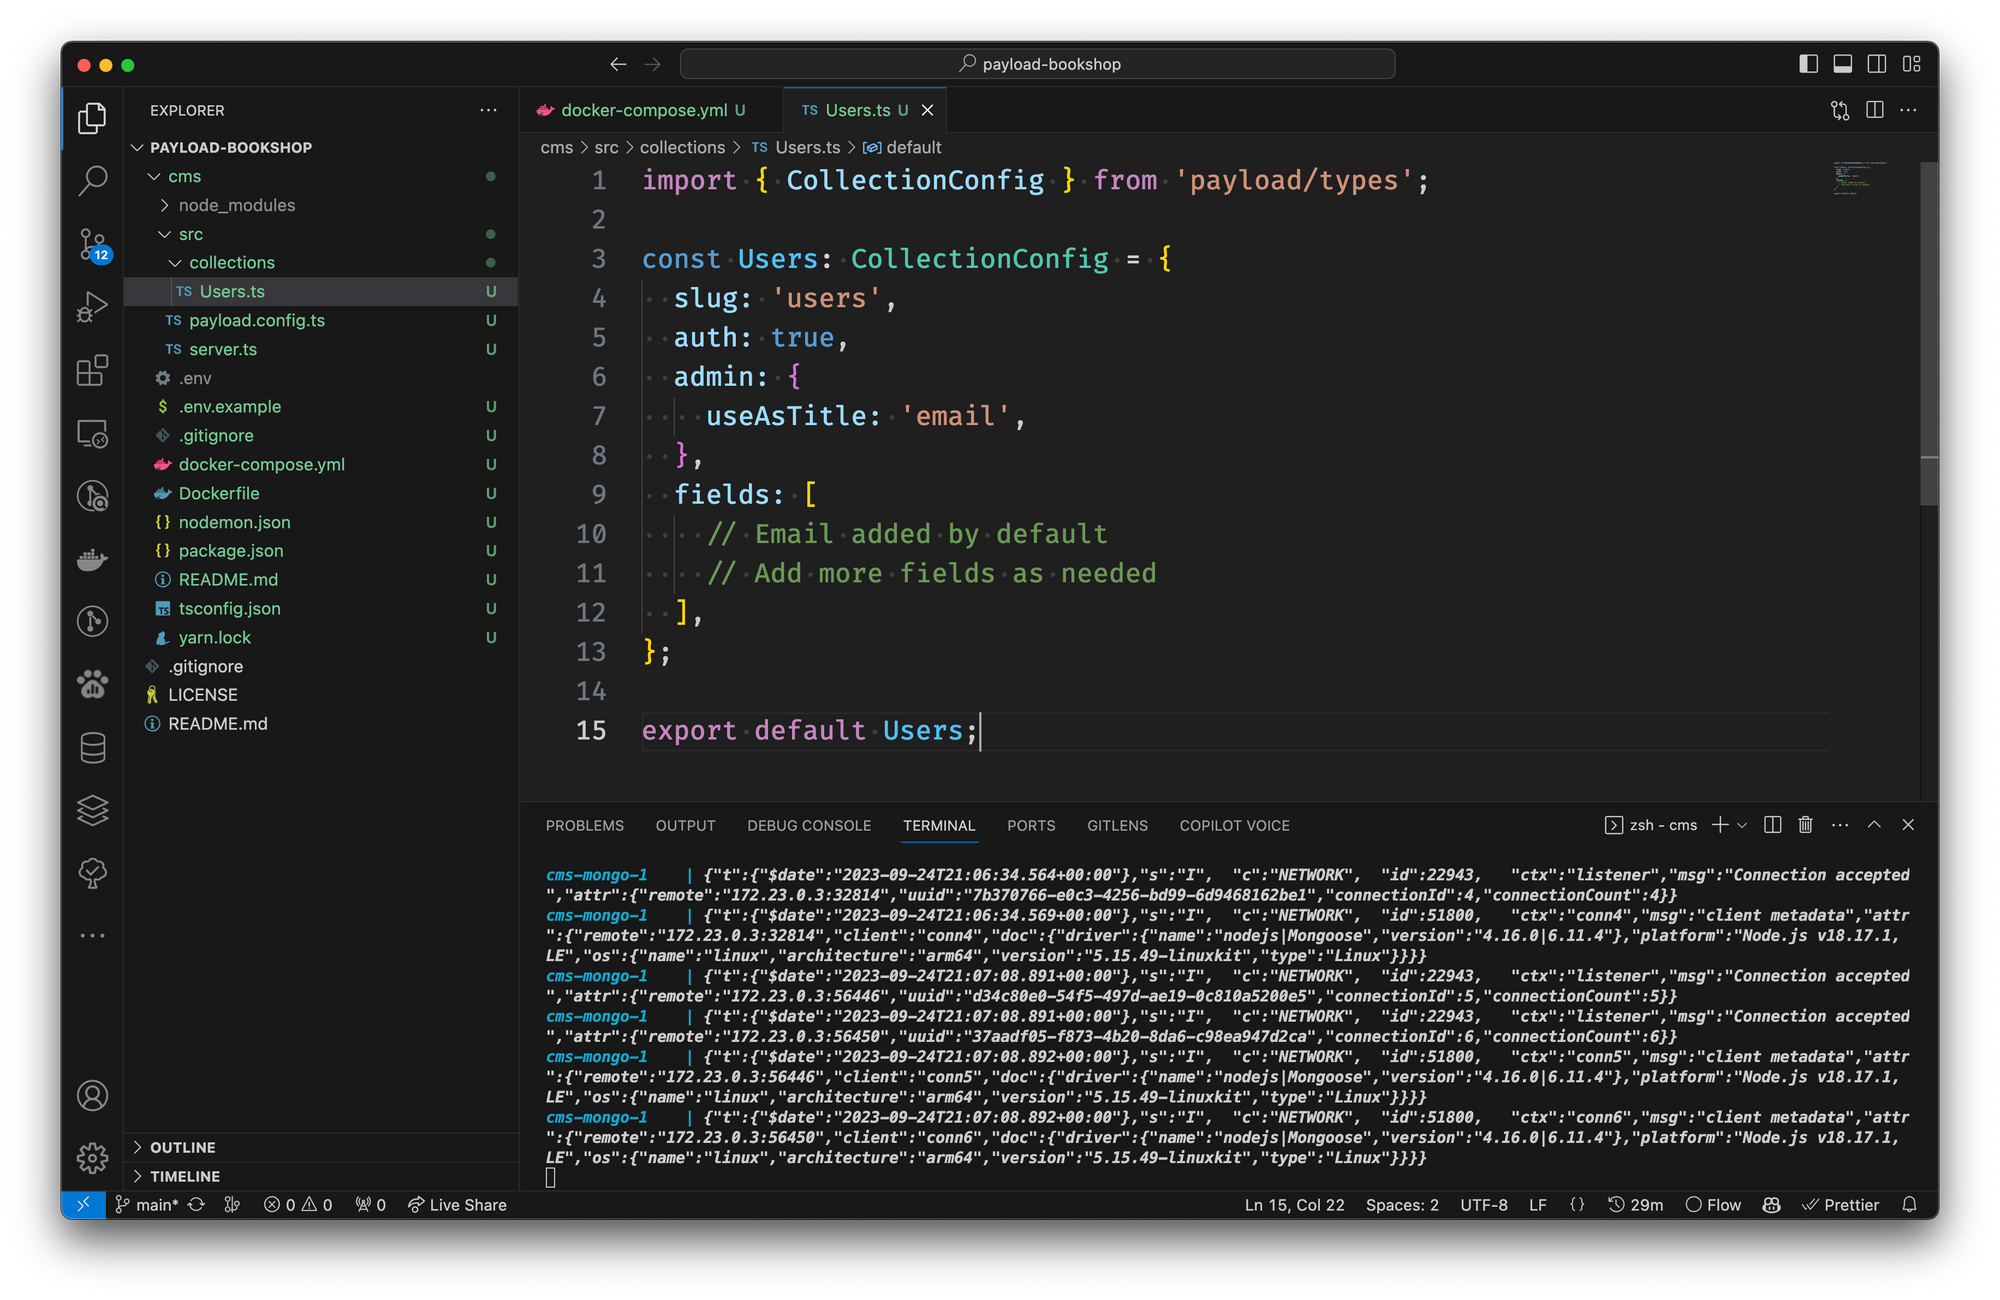
There is a slight change I make to the collections that Payload generates. I am very much into named exports in my development workflow. I will make another post on "why" this is my preferred approach.
Adding New Collections
Adding a new collection is relatively straightforward. Here is an example of a Books collection:
import { CollectionConfig } from "payload/types";

export const Books: CollectionConfig = {
  slug: "books",
  admin: {
    useAsTitle: "title",
  },
  fields: [
    {
      name: "title",
      label: "Title",
      type: "text",
      required: true,
    },
    {
      name: "author",
      label: "Author",
      type: "text",
      required: true,
    },
    {
      name: "description",
      label: "Description",
      type: "textarea",
      required: true,
    },
  ],
};
Once we have created this collection, we will need to add it to the array of collections in the payload.config.ts file.
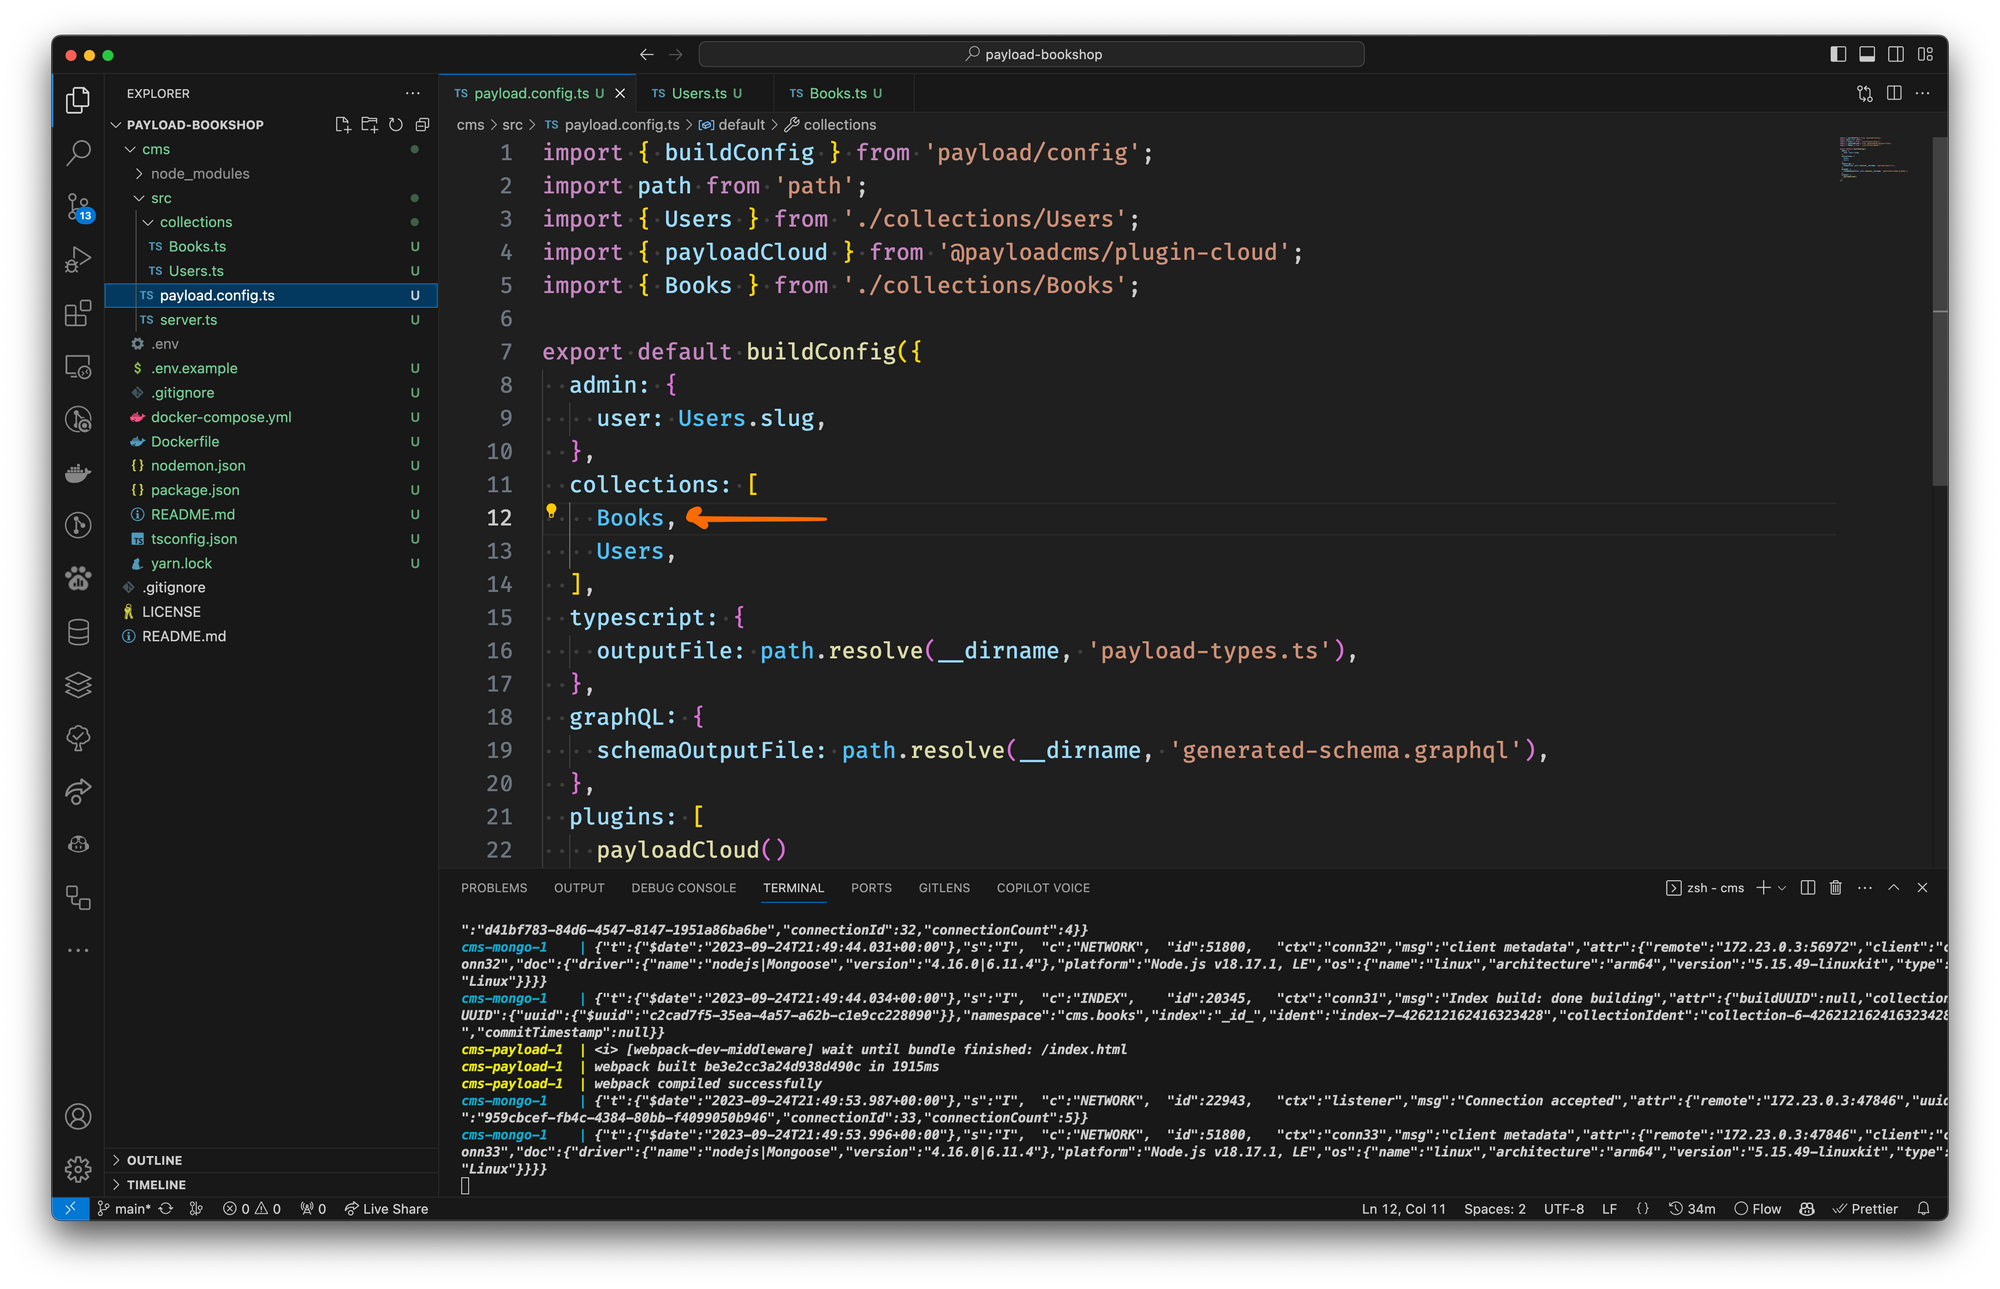
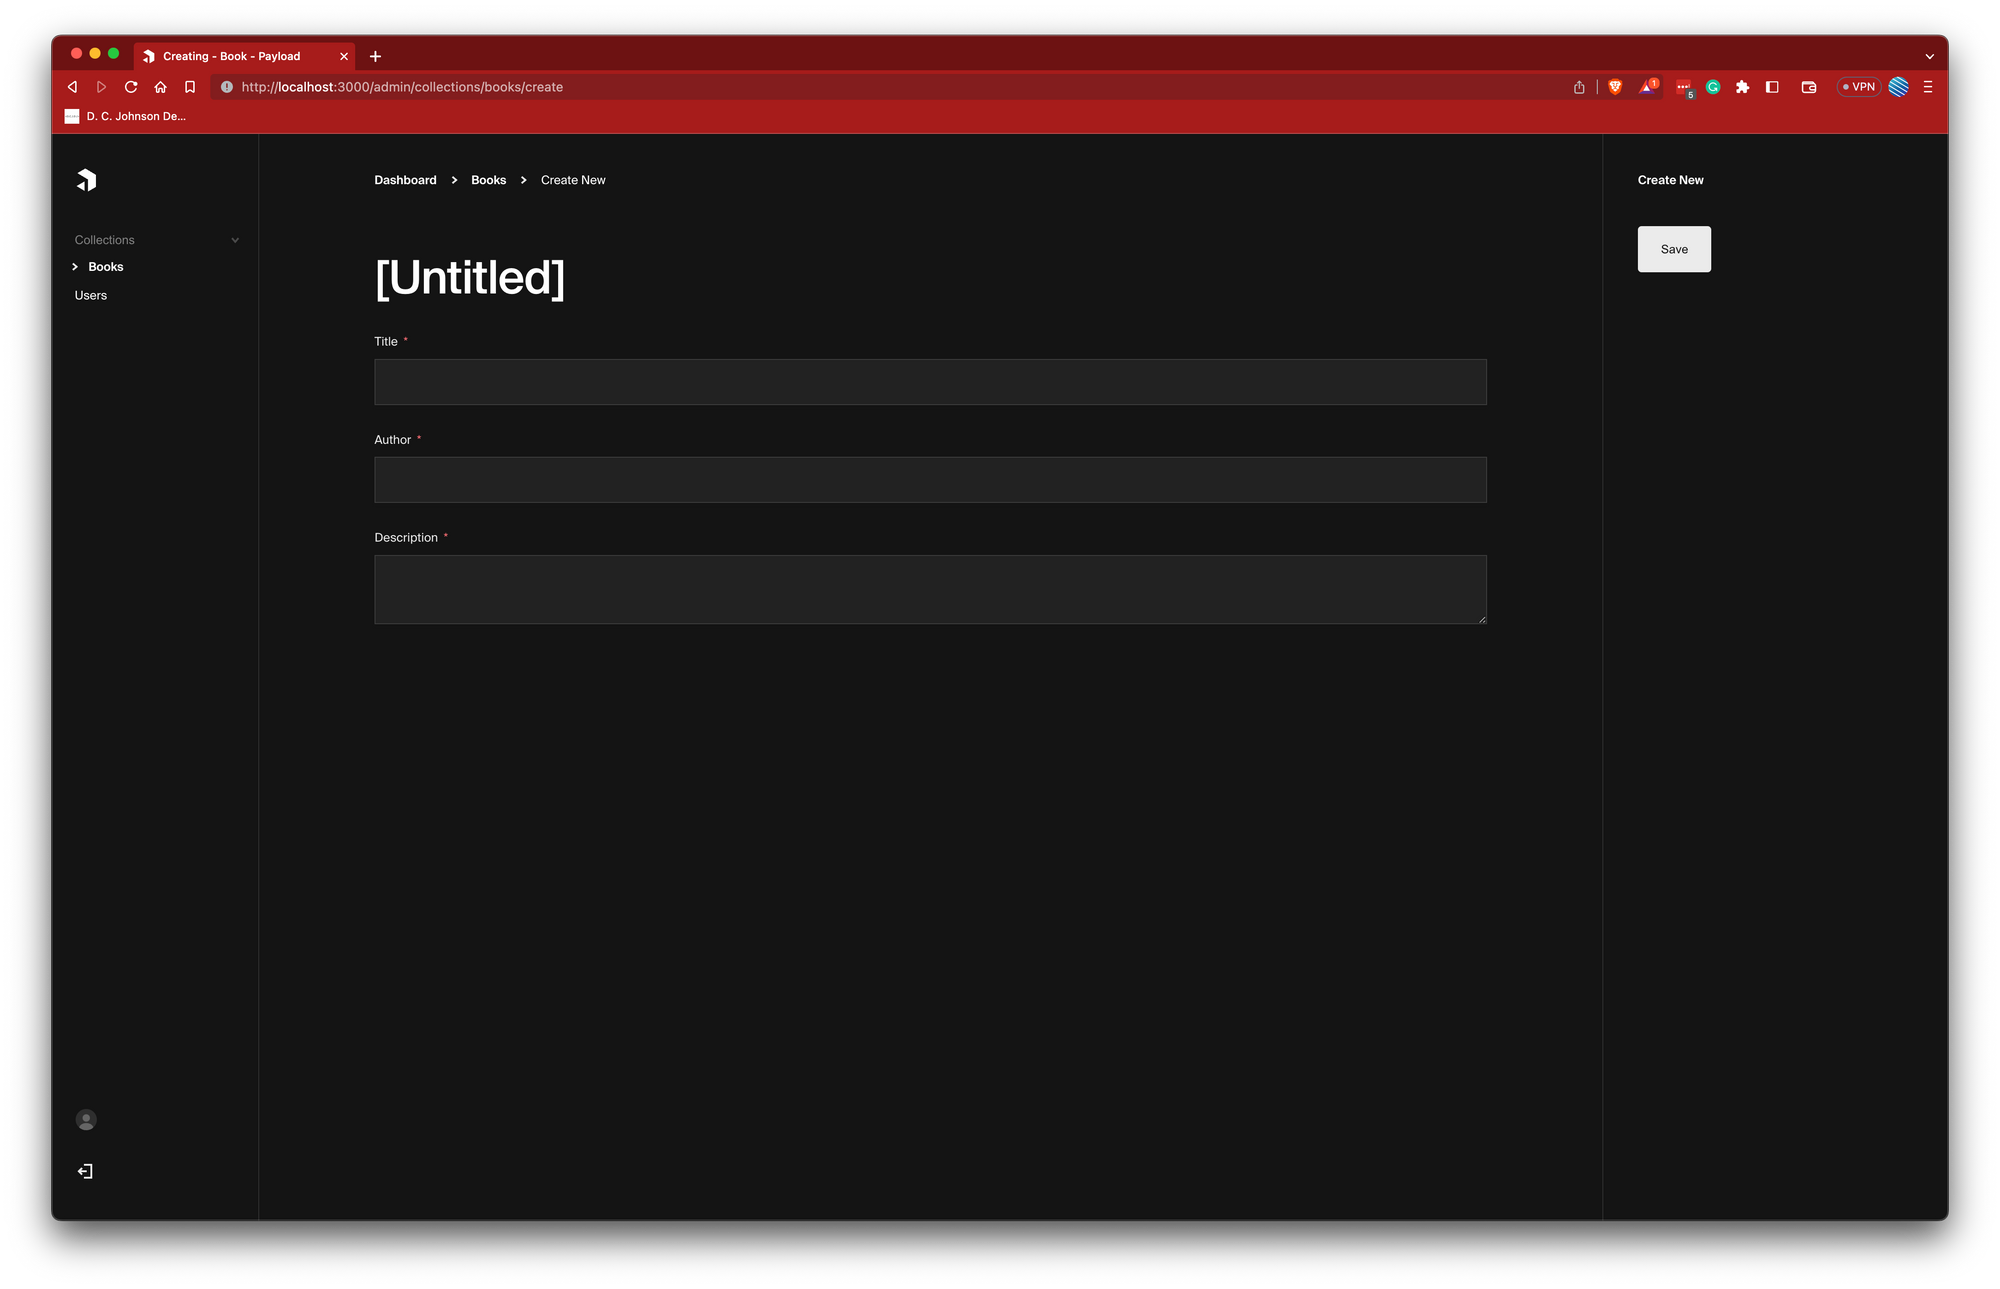
Once we have added this new collection, we will be able to see this in the Payload UI 🙌

And will be able to create new Books
Wrapping up
We've ventured through the intriguing realm of PayloadCMS, from understanding its core concepts and highlighting its key features to illustrating the setup process with visual aids. The power and flexibility of Payload, especially when combined with Docker, have undoubtedly shone through.
However, every journey has its waypoints, and while we've covered substantial ground, there remain unexplored territories. Sections such as "Authentication," "Deployment," and the intricacies of "Configurations" are invaluable facets of PayloadCMS that we haven't delved into just yet. But don't worry! These topics, among others, will be explored in upcoming posts. This post's goal was to give you a "lite" introduction to this powerful CMS and introduce you to some of the concepts you will need to know to make use of its full potential.